Louis XIV Revival Fauteuil, Upholstery Buildup, Back and Arms

Our client’s Louis XIV Revival Fauteuil, above.
We started, as we always do, with an assessment.
Then patterns were made and the textile and buildup was excavated.
The  frame finish was conserved.
The textile was cleaned and small reparations performed.
The frame was repaired.
The seat buildup (upholstery) completed.

Be sure to run your cursor over images
to see the text where applicable.


Arm Buildup


The arm textile pieces were conserved and stitched in the manner of the seat.

Coir was stitched onto the arm pod.  Jute burlap wrapped the coir and was stitched
into place.  Hair topped the amended pod, and a cotton topper before the broadcloth
was attached.  A thin topper of organic cotton batting was applied under the original textile, which was tacked into place.  The arm is ready for the gimp trim!

Back Buildup

The cleaned and conserved back textile had the same two issues
to be overcome in the upholstery process as the seat:
1) The edges had been trimmed to the edge, giving us no comfortable tacking edge.
2) The edge had thick embedded glue in the tacking margins.

Mitchell stabilized the edge prior to cleaning, and added the olive Dupinoni
silk with which to create a backing.  Mitchell had the same trouble with
the stitching because of the needles hitting the hard glue edges.
The backing allowed him an edge to tug on while applying the back textile later.

The original inside back hair pod was cleaned and shaped.

Into the outside conserved frame back the historic outside back showcover was
tacked into place; organic cotton batting is used under the dust barrier.
Another layer of cotton batting.   The original back pod is amended
with a different colored hair, and placed into the back frame.
Another cotton topper is placed over the hair pod, and topped with the broadcloth topper.
Another thin cotton topper, and the historic textile is tacked into place.

The chair is now ready for finishing touches, dustcover, secret pockets, and trim!

This slideshow requires JavaScript.

The fauteuil in nearly completed; next steps are finishing touches.
As we post I will link to the next posting: follow us so you are notified of updates.

Written by Kate Powell  ©MPF Conservation.
May be printed for your own use ONLY, not for use on blogs without permission.

Posted in antiques, art, chair, conservation techniques, decorative motifs, Interim Report, preservation, process, reparation, restoration techniques, upholstery, wooden objects | Tagged , , , , , , , , , , , , , , , , , , | 1 Comment

Louis XIV Revival Fauteuil, Upholstery Buildup, Seat

Our client’s Louis XIV Revival Fauteuil, above.
We started, as we always do, with an assessment.
Then patterns were made and the textile and buildup was excavated.
The  frame finish was conserved.
The tapestry was cleaned and small reparations performed.
The frame was repaired.

Be sure to run your cursor over images
to see the text where applicable.


Seat Buildup

The cleaned and conserved textile still had two issues
to be overcome in the upholstery process:
1) The edges had been trimmed to the edge, giving us no comfortable tacking edge.
2) The edge had thick embedded glue in the tacking margins.

Mitchell stabilized the edge prior to cleaning.  To give himself a comfort area
during re-upholstery, we chose a strong olive Dupinoni with which to create a backing.  Mitchell had trouble with the stitching because of the needles hitting the hard glue edges;
he is quite adept at the sewing machine but the glue pushed the textile around.
The backing allowed him an edge to tug on while applying the textile later.

Another perk of the lovely color is that if the needlepoint/petitpoint looses threads
at a later date the olive is a good complimentary color underneath.

Webbing and Spring Tie

The original thin webbing was used to obtain maximum drop over time.
The center of gravity on the seat originally dropped in the seat center,
while the edges remained firm.  Mitchell chose a 11 lb 2-inch jute webbing to
replace the original, which was a metric width and just over 2-inches.

Original copper springs were still viable; they were stitched to the seat.

As the former holes were filled, new holes were carefully drilled when necessary.
Spring twine was waxed as it was tied.
Four-way Spring Tie was completed.

Buildup

Springs were covered with a hessian burlap,
and a holbein stitch used to lash them into place.
Coir was placed at the edge and stitched.

The original seat pod was cleaned and conserved, then placed over the seat deck.
The stuffings from here up are all new stuffings,
as the seat was robbed of its second stuffings.

Original seat pod wrapped in burlap to preserve, and hand-stitched into place.
A layer of hog and horse hair is added and stitched into place;
the depressions made by the stitching pattern is filled with a bit of loose hair.
All this is topped with a layer of organic cotton batting,
and a hemp broadcloth secures the entire seat deck.

One more topper of thin organic cotton batting, and the original conserved needlepoint/petitpoint textile is reapplied and tacked into place, ready for the gimp trim.

This slideshow requires JavaScript.

Next step, the arm and back buildup.
As we post I will link to the next posting: follow us so you are notified of updates.

Written by Kate Powell  ©MPF Conservation.
May be printed for your own use ONLY, not for use on blogs without permission.

Posted in antiques, art, chair, conservation techniques, decorative motifs, Interim Report, preservation, process, reparation, restoration techniques, upholstery, wooden objects | Tagged , , , , , , , , , , , , , , , , , , | 1 Comment

Louis XIV Revival Fauteuil, Frame Reparation

Our client’s Louis XIV Revival Fauteuil, above.
We started, as we always do, with an assessment.
Then patterns were made and the textile and buildup was excavated.
The  frame finish was conserved.
The tapestry was cleaned and small reparations performed.

Be sure to run your cursor over images
to see the text where applicable.

The frame was in very good condition: two issues, numerous tack holes in the frame needed to be stabilized, and the corner blocks needed to be replaced.

We repaired the damage created by many tack holes.
Nail holes were filled with hide glue and hard picks were tapped into each.
This effectively fills the voids and creates a stronger frame.

A Japanese saw carefully cuts the pins to the surface,
and Mitchell used a chisel remove any unleveled nibs.

Mitchell removed old inadequate and damaged corner blocks on all four corners;
they were fragmented and too small for an entablature that will take
the tensions of the upholstery.  New corner blocks were cut and fit,
glued using hide glue, and nailed into place.

At this time the blocks had hard edges.

Hard edges were chamfered because the softened edges will not cut into the various materials of the buildup, including the tapestry if it comes into contact with them.  The corner blocks are also finished in case of bleed-through over the years.


The frame is ready for buildup, next steps.
(Note in this image the corner blocks were not yet colored.

As we post I will link to the next posting: follow us so you are notified of updates.

Written by Kate Powell  ©MPF Conservation.
May be printed for your own use ONLY, not for use on blogs without permission.

Posted in antiques, art, chair, conservation techniques, decorative motifs, Interim Report, preservation, process, reparation, restoration techniques, upholstery, wooden objects | Tagged , , , , , , , , , , , , , , , , , | 3 Comments

Louis XIV Revival Fauteuil, Cleaning Textiles

Our client’s Louis XIV Revival Fauteuil, above.
We started, as we always do, with an assessment.
Then patterns were made and the textile and buildup was excavated.
The  frame finish was conserved.

Be sure to run your cursor over images
to see the text where applicable.


We changed our proposed protocol after seeing how the tapestry had been cut to
the quick on the edges, above, and left tattering with no stabilization or overcasting
before its last upholstery.  We did not want to wet clean the entire piece because we did not want to chance shrinkage.  Instead we spot cleaned and used a method of repeated
top and bottom cleaning of the surface fibers that takes a bit longer, but is safer.

Further, the last upholsterer used a THICK coating of yellow carpenter’s PVA glue (not a white glue such as casein) to glue the gimp trim to the tapestry edge.  This glue is completely inappropriate, and removing the glue would be extremely difficult.
What appears to be a dirty edge is in fact a thick coating of glue  — we did not try to remove it at all, but are using it to help stabilize the edges at this time.

However, it was also more difficult to overcast the tapestry.
The needle and thread kept getting caught in this thick sticky PVA muck;
Mitchell is adept at using a serger!
The overcasting was successful but not pretty.

Protocol was to vacuum deeply on both sides using a soft brush attachment
which helped to lift the fibers and pull glitter and debris.
The seat was covered with glitter!  The tapestry also had several “splinters,”
and we cannot imagine how the chair came into contact with these.
They are not straw or fibers from the inside working their way out!

The tapestry pieces were then spot cleaned in several small areas, and using both a
repurposed and dedicated mushroom brush, and specialty wipes,
which also were used on the surface of the tapestry fibers to remove surface debris.

The crest of the inside back was especially dirty from hair oils and hands
grabbing the back of the chair over the years.  This area was thoroughly cleaned twice
using ®Orvus and distilled water, saturating and moving the dirt.

Above, it is interesting to see the original colors before they faded;
the back of the tapestry shows us the muted greys and taupes were actually purple colors of orchids and violets.  The muted pinks were brilliant, almost bubble gum pink…
Imagine if the rose and coral were actually the intended colors of bright pink
and bright orange next to the yellow, which held its pigment.

Two very small areas at the edges of tacking areas had damaged stitches.

This is a good time to explain about matching historic yarns.
The yarns are often difficult
to match because they are
not actual dye colors, but colors that have faded over time.  Right, you can see what appear to be two browns, but in reality are the same brown yarn, but one is very faded and appears to be tobacco, while the other is closer to the original color.  In the damaged area below, replacement area moves from faded to the original color where the tape covered it.

Sometimes one can match
the yarn exactly, but more often not.  One option if the area is not highly visible is to take a strand from each color and blend them, as shown right. (Note flashed color appears brighter.)  The damaged area on the rf-arm top was missing not only yarn but also the linen warp and weft of the grid which the yarn stitches into; this loss was right at the edge where
the folds and the tacking margins occurred.  I used
yarn to create the grid.

On the seat at the right-facing corner, another highly degraded bright bubble gum pink area both had faded missing stitches, and a degraded edge for tacking.
Again, I used two colors not at all like the original to blend a repair
on an edge that no one will notice even if it is pointed out to them!
After I needle-pointed the missing stitches, I wrapped the edges to secure
so that when Mitchell needs to tack into that area he has purchase, and
ran yarns up into the body before knotting for extra stability.

(Note that is not dirt but the terrible PVA glue at the edges!)

Above, the four tapestry pieces
after cleaning and reparation.

The tapestry is quite beautiful with varying kinds of needlepoint,
petite-point and stitches to create the bodies of the people and the Phoenix.
As you scroll through the details above, pay attention to the eyes and fingers and the various skin tones and sizes of the stitches.  It is quite beautiful!

The tapestry is almost ready for reupholstery.
Mitchell will stabilize the back using a strong but light silk.

Our next steps are reparation of the frame, and to restore the buildup.
As we post I will link to the next posting: follow us so you are notified of updates.

Written by Kate Powell  ©MPF Conservation.
May be printed for your own use ONLY, not for use on blogs without permission.

Posted in antiques, art, chair, conservation techniques, decorative motifs, Interim Report, preservation, process, reparation, restoration techniques, upholstery, wooden objects | Tagged , , , , , , , , , , , , , , , , | 5 Comments

Louis XIV Revival Fauteuil, Finish

Our client’s Louis XIV Revival Fauteuil from the nineteenth century
came in for treatment of the textile (gentle cleaning, and stabilizing from the back),
conservation of original finish, and conservation of the upholstery buildup (innards).
Before treatment images above.  We started, as we always do, with an assessment.
Our next steps were pattern making and excavation of the textile and buildup.

Now we move to preserving the lovely original finish.

Be sure to run your cursor over images
to see the text where applicable.

The fauteuil ready for finish work, above.

The last upholsterers had dripped glue on the carved finish;
this was carefully removed with a small chisel,
then steel wool removed the last of the glue.

We always make our own shellacs; often we make our own waxes,
but not always.  For the fauteuil frame, we decided to use two
of three commercial products we occasionally use.

We are not recommending these for your applications at home!
Our criteria depends upon the condition and the type of finish!

We started with Briwax.
We applied liberally and allowed it to set, then wiped it off.

We use Gamblin’s Gamsol OMS (Odorless Mineral Spirits) to scrub into the wax.
Gamblin’s OMS is so gentle — and nearly non-toxic!
We do not wear a mask when using it, just good ventilation,
and it does not cut deep into finishes.  A horsehair brush and a large oil painting brush from Kate’s stash was used to scrub. It was allowed to set, then wiped clean.

We then moved to Liberon’s Black Bison. We worked it into the details,
allowed it to set, then removed it selectively with brushes and a clean rag.

It was a lovely color, the original finish enhanced and cleaned,
but we wanted a bit more depth and a little more gloss.
A final coat of Briwax did the trick, applied then buffed for a semi-gloss sheen.

Before and after, below.  It should look like a well-appointed finish,
not new (which it is not), but clean and glowing with a nice depth of color!
A bit of the color shift is the lighting in different rooms…


Our next steps are to clean the tapestry and outside back wool rep,
to create the new buildup, and to reupsholster.
As we post I will link to the next posting: follow us so you are notified of updates.

Written by Kate Powell  ©MPF Conservation.
May be printed for your own use ONLY, not for use on blogs without permission.

Posted in antiques, art, chair, conservation techniques, decorative motifs, Interim Report, preservation, process, reparation, restoration techniques, upholstery, wooden objects | Tagged , , , , , , , , , , , , , , , , | 2 Comments

Louis XIV Revival Fauteuil, Excavation and Patterns

This slideshow requires JavaScript.

Our client’s Louis XIV Revival Fauteuil from the nineteenth century
came in for treatment of the textile (gentle cleaning, and stabilizing from the back),
conservation of original finish, and conservation of the upholstery buildup (innards).
Before treatment images above, though some of the gimp is removed.

We started, as we always do, with an assessment.
Our next steps are pattern making and excavation of the textile and buildup:
We apologize in advance for the strange yellow lighting in this room.

Because we are reupholstering the textile after we conserve the buildup,
we begin by taking patterns before we remove the textile.  Part of the pattern making process is to provide Mitchell with a template of the proper buildup.  Clear plastic allows Mitchell to make notes, identify tacking positions (to determine the number of upholsterings), and when the tapestry is cleaned, will assist with blocking.

One issue we saw immediately upon removal of the gimp trim was the excessive amount of glue applied.  It appears possible there was a repair sometime in the textile’s life, and the upholsterer trimmed the textile too close instead of turning the edge under, leaving the next upholsterer (us!) a poor edge with which to work.  We will have to be extremely careful because of someone who decided trimming was easier for them!

The seat textile removed, notations made, and the textile was set aside for cleaning.

Mitchell moved to the inside back, created the pattern, and began excavation.

The outside back fabric is also going to be reupholstered after it is cleaned;
the inside back is fully excavated to release
the outside back showcover fabric, a woven brown wool rep,
which may be a second generation showcover for the outside back.
There are notes in a few of  the images.

The arm tapestries were removed, and all patterning completed, above.

Finally the seat buildup was excavated.
There is a different fiber under an earlier tack, so there may have been
an earlier showcover or possibly this is a muslin.
There is not enough fiber to tell the story.

Most of the innards will be cleaned and re-utilized during the re-upholstery phase.
They were carefully removed, layer by layer,
and set aside in the order of removal, ready for cleaning.
It is unusual to see 2-inch webbing; usually you see a 3-inch webbing and fewer courses.  This is the original webbing, and Mitchell can affirm this because of the tacking holes.  Mitchell thinks they were trying to achieve a sprung platform which would
drop the center of gravity, making the seat more comfortable.
Copper alloyed springs place the chair between 1890-1910.


And we find this, though no other signature markings: “Made in Belgium,”
the original dustcover on the bottom!  Mitchell will place this back in the chair
as part of its history, but it is too rotten to reuse.

This slideshow requires JavaScript.

The exposed frame ready for repairs and finish work.

Our next steps are to clean the tapestry and outside back wool rep, and to conserve the finish.  As we post I will link to the next posting: follow us so you are notified of updates.

Written by Kate Powell  ©MPF Conservation.
May be printed for your own use ONLY, not for use on blogs without permission.

Posted in antiques, art, chair, conservation techniques, decorative motifs, Interim Report, preservation, process, reparation, restoration techniques, textiles, upholstery, wooden objects | Tagged , , , , , , , , , , , , , , , , , | 2 Comments

Washington State Flag: Painting


We left off with corrections and tracing the letters.

Know that the subtle shadings of colors from one blank to the next is due
to the artificial versus natural light in the room when photographed,
and fresh paint is much brighter than after it is cured…
also…
The test images were all done with basically one coat; on the final flag,

most colors are getting 2-3 coats on top of the base.  With the drying time
between (4-7 days) it slows the process down a bit.
Some colors dry a bit faster, but I have learned my lesson to be patient.

The Corona virus stopped things suddenly, and I did not get back to
painting for over four weeks.  We could not foresee how it would change our studio other than protocols: NO one in the studio after beginning of March, and
setting up a waiting station of incoming deliveries to sit for several days.
But, clients were concerned and needed to be reassured, pickups and deliveries were canceled, and we had to rearrange the studio for storing finished items long terms.
Painting George is not like doing a bit of touch-up.
I need four hour stretches to drop into painting an image.
The last day it looked like I was interrupted, above, and I was — and I lost mixed paint.
Starting back up I had to clean, remix some colors, and relax into the portraits again.

The lettering was created with a small 3/8-inch angled specialty brush.
I decided not to use the mixed paints because of the separation;
metallic paints have different properties and ways of mixing with other paints.
Instead I painted one the Rich Gold, and two in the Pale Gold.
The lettering was actually the most difficult of the tasks,
because of the way I had to stand with the small brush making precise marks…
I wish I could have flipped the blanks around into various position
to make it easier, but they are large and unwieldy.

It is risky to show faces that are basically blocked in —
A layer of paint must go on underneath on the silk to cover the green,
then fine tuning can be done.  Without 2-3 coats of thin paint the portrait become too textural — something that I do not want in the flag.  Above you can see how as I fine tune (this is still not quite done) he begins to look more like himself; still, his eyebrows
are not quite right, and his nose needs a bit of work.

Below, Portrait #3 as it progresses from transfer sketch to an almost finished face.

Portrait #3

Lining of the lettering, finishing George’s other faces, lace on his blouse,
and coming back for fine-tuning or corrections if needed —
and I am complete with the painting of the portraits.

To begin at the beginning, visit Washington State Flag, 1.

©MPF Conservation.  May be printed for your own use.
May be reposted if our url + copyright is used as reference.

Posted in antiques, decorative motifs, Interim Report, painted objects, process, reproduction, textiles | Tagged , , , , , , , , , , , , , , , , , , | 1 Comment

Washington State Flag: Painting


We left off with the background and the beginnings of the jacket, above.

Know that the subtle shadings of colors from one blank to the next is due
to the artificial versus natural light in the room when photographed,
and fresh paint is much brighter than after it is cured…

The test images were all done with basically one coat; on the final flag,
most colors are getting 2-3 coats on top of the base.  With the drying time
between (4-7 days) it slows the process down a bit.
Some colors dry a bit faster, but I have learned my lesson to be patient.

The undercoats on the face laid in shadows and covered all green.
Do not be worried about the blocky undercoatings; he will look better!
I am a bit uncomfortable showing the face with the undercoats to people
who are not painters — George looks bit freaky!

A second coat on background was added.
An undercoat and a second coat on the hair.

As his jacket was begun, the yellow lapels are added.
A second coat is added to the deep blue jacket.

January-February, there were also three days of corrections.

I felt the lapels were too bright, above, and subdued them in the second coat — the fresh paint is brighter, and I am working against bright green versus the faded olive green, and sometimes adjustments have to be made.

I also felt the primed edge needed to be a more generous.  I traced out the edges again, giving me a tiny bit more “slop” in case.

Frankly, tracings are a stressful as paint —
Again, I can’t clean paint or wayward tracing pencil off the bright green silk.

Next post, I tackle the letters and fine tuning the faces.

To begin at the beginning, visit Washington State Flag, 1.

©MPF Conservation.  May be printed for your own use.
May be reposted if our url + copyright is used as reference.

Posted in antiques, decorative motifs, Interim Report, painted objects, process, reproduction, textiles | Tagged , , , , , , , , , , , , , , , | 4 Comments

Mognat of Paris Steamer Trunk, 2, Prep Work


This Mognat of Paris family steamer trunk ca 1900, has been round the world many times.  The heirs brought it to us to clean, stabilize the inner lining, create new handles, and to preserve the character of the outer trunk memories if possible — stickers!

This slideshow requires JavaScript.

This Mognat of Paris family steamer trunk ca 1900, begins here with the assessment.

The original leather handle was removed as it was terribly degraded:
we will use this as a pattern to create three new handles,
as the handles on each side are missing.

The strapping leather for the handles is hand-dyed:
Three to four layers will be sewn together to create each handle.

EDIT: Though we created strap leather for the trunk we are not using it.
This leather will not be wasted — it is a color that is often found in many chairs and other pieces.  However, the leather we are using for the handles replacement will
be matched to the cleaned leather, which is much lighter in color.

Note the color difference in the front of the trunk and the bottom —
the front and sides once showed off this lovely patterning!
We hope to remove enough grime that we can again see the patterning.

We test cleaned the left-facing outside back of the trunk, beginning with the least
invasive to the most invasive.  The trunk is covered with a type of oil cloth; because of this,  we decided not to test Vulpex because of its tremendous ability to remove oils — it might damage the oil cloth.  We always start with distilled water.  Neither distilled water nor Orvus really had any impact.  We finally tried a mild solution of Borax and organic unscented dishwashing detergent, followed by rinsing.  This moved the grime!

Tests are made, and we are ready to begin.
The oilcloth and the leather will be treated after cleaning to add oils.

Examples of sticker and labels we will attempt to preserve.

Next step, cleaning, creating and reassembling.


Written by Kate Powell  ©MPF Conservation.
May be printed for your own use ONLY, not for use on blogs without permission.

Posted in antiques, conservation techniques, Interim Report, preservation, process, reparation, restoration techniques, textiles, upholstery, waxes, wooden objects | Tagged , , , , , , , , , , , , , , , , , | 4 Comments

Mognat of Paris Steamer Trunk, 1, Assessment


This Mognat of Paris family steamer trunk ca 1900, has been round the world many times.  The heirs brought it to us to clean, stabilize the inner lining, create new handles, and to preserve the character of the outer trunk memories if possible — stickers!

We do not often have the opportunity to conserve trunks and they are interesting projects.  This was a beloved family members trunk, and the family wants to be able to gently use it in their home.

Note: We do have a second steamer trunk on our blog,
a Wood Trimmed Steamer Trunk circa 19oo.

This slideshow requires JavaScript.

Above, a slideshow showing all sides of the trunk before conservation.

Note the color difference in the front of the trunk and the bottom —
the front and sides once showed off this lovely patterning!
We hope to remove enough grime that we can again see the patterning.

Details of the front.
Note the original handle?
This is the pattern of the handle we will recreate not only
for the front, but the sides as well.

Examples of sticker and labels we will attempt to preserve.

The upper insert with its degrading lining and ties will be removed, cleaned, and stabilized.  The bottom and top lining is in good condition: we will test it for cleaning
and see if it is a good candidate for cleaning while attached.

Note the strapping’s jacquard has the Mognat name woven into the fabric, image 6 above.

Next step, test cleaning and leather prep.


Written by Kate Powell  ©MPF Conservation.
May be printed for your own use ONLY, not for use on blogs without permission.

Posted in antiques, conservation techniques, Interim Report, preservation, process, reparation, restoration techniques, textiles, upholstery, waxes, wooden objects | Tagged , , , , , , , , , , , , , , , , | 4 Comments

Chinese Diorama Table, 2


Continuing from the first post of our client’s Chinese carved diorama
from the nineteenth century, we move now to the
reparation of the figurines and decorative elements.

Phase Three, Reparation

We used two glues, hide (we use only Old Brown Glue)
and fish glue (we made this time), depending upon the two surfaces being glued.
I am not fond of the smell of either, though Mitchell keeps trying to
reframe it for me, as he calls it the “smell of success!”

Protocol

  1. The protocol was to make sure the piece was properly positioned before gluing.
  2. The gluing surface was lightly scuffed with a fine, tiny amazing tool called
    Sandits Sanding Sticks, (though we buy them in large lots of the various grits)
    a bit like a Q-Tip dipped in sandpaper.
  3. Hide glue was applied to both sides, being careful not to apply too much — I could not come back and remove excess glue at the risk of removing the decorative colors.
  4. The piece was either shimmed to hold it in place, or held for about ten minutes until it set up.
  5. Broken pieces were allowed to set overnight before a second gluing.

Simpler glued pieces, above.

This little triangular piece of banister needed
a clever shim to hold it against the rocks for gluing!

The intact female was not broken; note she also had a previously applied
wooden shim on her backside (compare to the one below).

The broken female figure had a clean break, however, she was so very thin (no wood shim behind her) that securing her was difficult.  I had little room to create a wood shim, so I used Japanese paper, very thin, very strong, applied in layers with hide glue.  This sat overnight, and the next day I was able to slip her into place.

Reparation completed —
unless we find that newel post!

Above, the entire vignette divided into thirds with the details located in each third.
It is so lovely, I wanted to share!

Phase four, wooden base, next post!

Written by Kate Powell  ©MPF Conservation.
May be printed for your own use ONLY, not for use on blogs without permission.
Note: As an Amazon Associate I earn from qualifying purchases.

Posted in antiques, art, conservation techniques, decorative motifs, Interim Report, painted objects, preservation, process, reparation, restoration techniques, wooden objects | Tagged , , , , , , , , , , , , , , , , | 5 Comments

Chinese Diorama Table, 1


Our client’s Chinese carved diorama
from the nineteenth century is one
of the most delightful items I’ve had
the pleasure to treat.  It is a pavilion
over water, with big rocks with large
trees of varying sorts along the base.
The upper level is adorned with
beautiful women enjoying their music
and possible various sewing arts, and
flirting with the men below.  Below men
are working, and some are looking up rapturously at the adoring women.
One of the men on the lower level
appears to have a much more elaborate costume, left, and I assume that
this man may have some sort of
ownership or higher standing.

The table also has a wooden form that holds the diorama and
a glass top, both of which will also be conserved.

Phase One, Assess Figurines

When our client brought the table to us, only a few figurines appeared to be loose;
our first phase was to see if others were also loose.
Mitchell disassembled the table so that they could be examined without the glass.

If you look closely at the top image, you can see the torso of the broken figurine (right)
just above the “ns” in our name.  She was the fifth female from the left on
the balcony of the pavilion.  She came apart in a move, and we believe as she fell (her legs were found behind the stair railing) she took the leaves along for the ride.
We haven’t found the location of the bubbly carving — and not sure if it is supposed to
be foam from the water, or an unknown bit of foliage.  I am inclined to the former.

  To test if any other parts were loose, I gently
touched each figurine,
tree, or landscape part
with the dental pick, right.
If it was loose it lifted easily.

Several more tiles, leaves,
and a second figurine,
happily not in pieces, was found to be loose.

We finally discovered the proper location of a sharp triangular piece; it is
behind a tree, part of the lower banister, next post.

Only one part could not be found, and that is a small part of the stairwell, above left.
The newel post is missing, and we know should be there because it has a small gap and cannot be glued in place without it, seen in the right image of the stairs.
It may have slipped and is lodged deep behind the railings, but we could not find it.
(The temptation, of course, is to gently shake it loose but the table is too fragile!)
If it suddenly appears before the table is reassembled we can easily glue it in place.

Phase Two, Clean

Over the years tiny bits of the figurines have sloughed off; it appears as sand!  This was vacuumed carefully on the painted wooden background and over the figurines and decorative building parts with a tiny funneled textile vacuum set on low suction, above.

The sky along the top had
an odd sticky quality to it.
It attracted the “sand” and it stuck to the sky, above right. As the sky is a painted
wooden base, after testing
we knew we could gently
clean it using distilled water and cotton swabs, and the ridge at the top of the sky
was carefully cleaned of
debris and the sticky substance.

You can see the grime removed on the cotton swabs, above left.

We tested the clean-ability of the figurines on the edge of a cloud, above right. A slightly damp cotton swab touched the edge and the blue from the cloud came off on the swab.

THE FIGURINES AND THE APPLIED
DECORATIONS MAY NOT BE WET CLEANED!

A substance that looked like common black machine grease was found in several places on the white railings; we have no clue as to how it might have arrived on the railings!
It was easily cleaned, and as there was no colorful decoration on the railings, it was safe to do so, above.

Above, I leave you with details of the lower right-facing corner of the diorama, and a central portion of the balcony with four women — neither had repairs — after cleaning.

Phase three, reparation, next post!

Written by Kate Powell  ©MPF Conservation.
May be printed for your own use ONLY, not for use on blogs without permission.

Posted in antiques, art, conservation techniques, decorative motifs, Interim Report, painted objects, preservation, process, reparation, restoration techniques, wooden objects | Tagged , , , , , , , , , , , , , , , , , | 1 Comment

Louis XIV Revival Fauteuil, Assessment

This slideshow requires JavaScript.

Our client’s Louis XIV Revival Fauteuil from the nineteenth century
came in for treatment of the textile (gentle cleaning, and stabilizing from the back),
conservation of original finish, and conservation of the upholstery buildup (innards).
Before treatment images above, though some of the gimp is removed.

We start, as we always do, with a assessment while everything is still intact:
what is seen when taking detailed images is exciting.

The hand-carvings are beautiful and in good condition (a sampling),
above; we found no need
for amendments of broken
petals or leaves.
Hand-carving is easily evident, right, where you
can see the makers
hand marks as a smooth
area was carved.

The original finish is intact, with some flaking of
shellac and a beautiful patina.  The finish is extremely dirty.

When the textile is removed
it will be easier to examine
it for small bits of missing yarn, if any; at this time
we saw only two small areas where there may be an issue.

This lovely gimp is stiff
with either glue or topcoats
of shellac.  What we can see now by removing the gimp trim is that the tacking margin on our textile is small and there are bits of fraying under the gimp.  MPF Conservation has ways of mitigating this without reweaving.

Our next steps are pattern making, excavation of the textile, and cleaning.
As we post more I will link to the next posting: follow us so you are notified of updates.

Written by Kate Powell  ©MPF Conservation.
May be printed for your own use ONLY, not for use on blogs without permission.

Posted in antiques, art, chair, conservation techniques, decorative motifs, Interim Report, preservation, process, reparation, restoration techniques, upholstery, wooden objects | Tagged , , , , , , , , , , , , , , , , | 12 Comments

Treatment: Portrait of 
Marie-Antoinette

Before and after treatment, above.

Our client’s framed oil painting of
Marie-Antoinette fell off the wall and
was scraped in two dozen areas.
Luckily there were no punctures,
but a half-dozen dents or serious
scraps created a need for wax/resin
infills before painting infill.

The painting has no visible signature.
It appears to be a (very old) lovely
student copy of the image hanging in
Versailles, by Élisabeth Vigée Le Brun, right.  Students often copy famous
paintings for practice; as long as no
fake signature is applied it is not forgery,
and good student images have value.

Protocol for treatment was to:
1) Gently clean area to be treated.
2) Infill and shape deep indentations (above) and deep scrapes as necessary using
Gamblin’s Pigmented Wax/Resin (PWR) using a wax carving pencil.
3) After curing, paint infill (mixing on palette) to match surrounding areas
using Gamblin’s Oil paint in the following pigments: Burnt Umber, Raw Umber,
Phthalo Green, Warm White, Golden Ochre, Pink Brown,
Van Dyke Brown, odd bits of premixed flesh colors, and Galkyd Gel.
4) Care was taken to match color/stroke patterns in the areas large enough for them to be seen; texture was matched when possible with the PWR before the infill.

Before and after sample areas, below.

Before and after treatment, above.

©MPF Conservation.  May be printed for your own use.
Please ask permission to repost.

Posted in antiques, art, conservation techniques, decorative motifs, Interim Report, painted objects, process, reparation, reproduction, restoration techniques | Tagged , , , , , , , , , , , | 2 Comments

Susan’s Antique Crazy Quilt Repair

End of this year I had the pleasure of repairing on our client’s Grandmother’s antique quilt. Pleasure because as I worked on it the imagined original beauty came alive;  pleasure because our client is interested and excited!

Our antique quilt repairs are in keeping with the antique quilt’s year of birth and tradition techniques, and all hand-stitched.

Our estimates for repairs are usually free.

As you can see above, her grandmother
created beautiful crewelwork!

Out goal was to replace the threadbare patches, leaving intact as much historic crewel as possible.  This meant I could not loosen seams and replace whole patches because the crewel was intact.  I needed to patch over the threadbare areas, while leaving intact crewel stitches alone.

Then we were to edge the entire quilt as best we could…
and I say this because this was a working crazy quilt, and it appeared that over time patches were added, so the entire quilt was never squared true in any direction.
Originally there were rich velvets, but we could not use velvets because it was too difficult to turn edges under in this situation.  In a new crazy quilt, it is likely that a quilter would lay the velvets flat and turn silk and cottons under over it to achieve the shapes.
We used bits of silks in the place of some of the rich fabrics.

There was a budget; Susan left it up to me to decide which patches to replace.
I began by creating patterns of the patches.

On a project like this you can easily do three times the work I did, especially if you repair original crewel stitches, but the shredded threadbare patches were easy to choose first.  I chose more patches than I could do, and then set to replacing what I could in the time allotted.
(And yes, I did a bit more than I was paid to replace.)

Part of the initial project was finding compatible cottons.
I took my color cues by looking at the bits of disintegrated fabrics.
Many were purple!

Of the ones I bought I used half, as some just didn’t feel right once I saw
them balanced on the quilt.  The bits of bright green silk, bright gold and yellow silk, and bright purples gave the quilt some of its original punch.

I changed the layout slightly from this first pass — I found a bit of bright yellow silk in my own stash and used it, and moved the green silks a bit.

Once I had the colors laid out, I went to work.

I didn’t want to cover the historic crewelwork that originally graced the right purple patch in this area, so chose to create a split patch.  Susan’s Grandmother used unusual bits of yarn — note the purple eyelash?
She must have been a knitter.

This kind of repair is so different than quilt making — the tiny thin angles that would usually be created by overlapping patches have to be made when possible by folding under.  Sometimes it is impossible, and I turned the tight corner under.

This was very thick green silk, bits from the Washington State DAR Flag.
I did the central crewel stitches on the plain silks on a hoop before I placed them on the quilt.  Patches were stitches, then crewel work added.


The central motif was once a long strip of purple.

I chose a purple border because after inspecting the original bits of lost fabric, her Grandmother was fond of purple… Many patches were shades of purple.

Unfortunately, and even giving her time, I was not able to come in and
repair crewel stitches which were damaged.  In some ways this is okay with me — the family can easily tell which is Grandma’s crewel work,
and which is mine, which is on the newer fabrics only.

The final images of the crazy quilt!

©MPF Conservation.  May be printed for your own use.
May be reposted if our url + copyright is used as reference.

Posted in antiques, conservation techniques, decorative motifs, history, Interim Report, preservation, process, reparation, reproduction, restoration techniques, textiles | Tagged , , , , , , , , , , , , , , , , , , , , , , , , , | 2 Comments

Dutch Spindleback Ca 1600

Edit, update from Mitchell:

“The chair featured in this article is very old. It was probably well into it’s use
at the time Henry Hudson first made his way up the river which became his namesake.  It was originally a woven seat. It was never meant to be upholstered.
Once the die was cast,
the first upholstering created untold damage
o the old and fragile rails, and there was no

possibility of going back to its previous woven construction.

There are many things about this chair’s construction and materials which deserve defining and exploration.  In this brief article I only alluded to those particulars. That said, all the decisions made relative to materials and engineering were considered relative to the impact of the historic parts and the long term preservation of this historical, structural, decorative object.  Once tacks and staples were introduced to the foundational members the seat structure was evermore compromised, as we discuss. The lignum vitae side-rails were split making it impossible for them to withstand the shearing forces created by a woven seats tensions.

As the piece was to continue to grace a home (not a museum), I settled upon a plan of practical engineering which would allow for weight distribution to be spread over the surface of a cushion while also minimizing the impact of downward forces upon the historic structure.  Ultimately, almost all downward and oblique forces were removed from the fragile side rails and instead transferred to the newly fashioned front
and rear rails, floating plywood platform and goose down cushion.”  ~MRP

It started when our client noticed her family chair collapsed in the front.  Prior to the 20th century, this chair was a woven seagrass seat.  Previously someone chose to upholster it.  When we brought it in for treatment, we were not prepared for the “hack job” performed during its last  conversion.  A previous upholsterer used an old plywood sign to bridge
the aprons, and applied one piece of webbing to secure the platform, along with various nails and hardware.

To do this to such a beautiful old piece of history
is a travesty and cannot be reversed.

When we fully and carefully excavated
the chair, we found both front and
back apron were terribly eroded by
beetle infestations.  The cause of
the collapse of the apron at the
right-facing leg to apron join was that
a good deal of the apron was missing.
Rather than repair the problem,
previous poor upholsterers had
continued with their “slap-dash” fixes,
this time using a single piece of
webbing to hold up the platform,
or makeshift seat deck. Also, the pressure
of the right-facing apron not holding
its own weight caused the left-facing
apron mortice to pull down and split the
left-facing leg in multiple places.

Further, the lignum vitae siderails had been split along multiple radial lines
from prior successive indiscriminate applications of decorative nails.
Compounding these splintering breaks and voids fragmented sharp staples protruded from the surface and deep gouges to the surface from the sloppy use of previous upholsterer’s ripping chisels used during the removal of previous upholstery covers.

The first thing we did was to remove a gazillion staples and repair the damage previously created by many tack holes in the side aprons. Nail holes were filled with hide glue and hard picks were tapped into each.
This effectively fills the voids in the lingum vitae and creates a stronger side apron.  Due to
age and tight construction,
we elected not to disassemble and replace the siderails.

A Japanese saw  carefully cuts
the pins to the surface, and
these are gently sanded flat.


Old mortices were carefully bored of remnants of mortice and glues.

The centuries old chair was too fragile
to be taken completely apart,
so an innovative apron was designed
to allow a new apron to slip into
the space.  Having seldom seen this
kind of response to the dilemma of age,
my parameters for the new aprons were:
1) to lock or snap into place as
the legs could not be splayed to
insert a new apron,
2) to conform to the original
hand-shaped legs,
3) to be no bigger than the slim
profile of the original apron,
4) and when all parts were in place,
to be locked into position as
a strong unified structure.

To that end I designed an interlocking tenoned bridge.
I used Eastern hard maple for both its slight surface crushing ability and its ability
to hold a tenon when kerfed.  For the kerfed bridge spline/tenon I chose
a thick sliced tangential grain rosewood with white oak locking pens.

Each new apron was
made of several pieces:

1) Two hand-shaped
Eastern hard maple
parts to make each
apron with Eastern
hard maple dowel
inserted into each end,
2) A long locking tangential grain rosewood bridge,
3) Two smaller locking
center joints at the fulcrum, also of rosewood,
top and bottom,
4) Four hard white oak pins to unify the center joint.

Once assembled using hide glues and a mixture of gap-filling PVA,
the apron was stronger than the original, and also beautiful.
I was sorry to have to cover it up!
The new design prosthetic accepted the upholstery perfectly.

In an ideal world the chair might have been returned to its original woven seat.

I did not want to place webbing around the side aprons as an additional seat support because of their modest connection (girth of tenons) and their previous mishandling by upholsterers.  I settled upon the structural bridge and attached the plywood to the
two new rails.  The original plywood signboard was actually a piece of
early 20th century ply, which was made of solid wood core instead of layered veneers.

The plywood was cut in the center to allow for a cushion drop, and furred out to accept foundational webbing.  This effectively dropped the center of gravity in the seat allowing for greater comfort during sitting once the fresh down cushion was installed.

Our client did not want a new silk showcover and asked us to utilize the existing show cover.  Our second problem was the previous upholsterers had cut the original silk seat deck show cover with NO extra margin beyond the eroded stapled edges — they had literally cut it to barely cover the edge of the desk.  The edges were tattered from the staples.  I used a second piece of silk to reinforce and allow for a new secure edge, and also cleaned up the tattered edges by overlocking the edges so they were no longer unraveling.

Hair and cotton batting to soften the edges, and the new deck
was placed onto the repaired seat with just enough room!

The previous cushion was replaced by a new handmade down cushion with baffles to keep the feathers from migrating.  I also reinforced the edges of the original show cover as the prior upholsterers had not overcast the edges, so the cushion silk would not unravel.
Note:  The shape of the cushion was not our design:
we simply created the new stuffing.

We might have suggested a very different type of cushion.  However, with the new stuffing, as the cushion is sat upon the down will compress over time, allowing the sitter to
not only drop into the seat properly, but will also insure that the sitter’s weight will now
be evenly distributed over the entire chair’s structural surface, mitigating the
potential destructive downward force upon the four hundred year old frame.

With a little bit of extra care by the owner and the careful choosing
of future upholsterers, this chair should grace their home for another century.

Before and after, with
and without cushion, above.


Written by Mitchell Powell  ©MPF Conservation.
May be printed for your own use ONLY, not for use on blogs without permission.

Posted in antiques, art, conservation techniques, decorative motifs, Interim Report, painted objects, preservation, process, reparation, restoration techniques, wooden objects | Tagged , , , , , , , , , , , , , , , , | 8 Comments

Yves Telemak Beaded Voudo Textile: Ezilí Dantor


This beaded sequined textile by Yves Telemak was one of
the most delightful projects I have worked on!
Intricate folk art, with thousands of sequins and pearls each with a tiny seed bead!
And the colors!  Modern art and folk art… so beautiful!

The back story of how our client came to own this lovely piece made me think about how art heals, and how you should pay attention when your heart wants a piece of art…
but that is her story to tell.  Suffice it to say that it came to her when she needed it,
an antidote to the work she was doing just out of school.

Ezilí Dantor or Erzulie Dantó is a senior spirit (loa) in Haitian Vodou.
She is a protector of mothers and women and children.
Her day of worship is Tuesday, and the solitary practice is
performed in front of an altar in blue, green and red.
Common offerings are créme de cacáo, jewels and perfumes.
Once a year (her birthday) there is a festival and a wild pig is roasted.

By the way, she is not the first Elizi Danto I had the pleasure to conserve;
I also cleaned and repaired Ken Ellis’s Embroidered Textile Art.

Of course, Elizi Danto reminds me of the Virgin Mary,
and is more in keeping with the ways I saw Her as I went to Mexican churches
in Southern California, where the Virgin was bright and lively,
not subdued as she is seen in many northern city churches.

The piece, by the famous artist Yves Telemak (see bottom),
was in excellent condition but had small rips, a few missing sequins,
many missing seed beads, and many many loose sequins and pearls.

My first step was to inspect the entire textile to assess problems.
Digital imaging has made this so easy — I inspect it thoroughly during assessment,
while also creating an estimate, and snap pictures as I find issues,
and then I can make sure I don’t forget it if it is not extremely obvious!
I prefer not to wear gloves because they make moving intricate parts difficult.
I frequently wash my hands of oils and I am now very good at not touching
my face or hair, picking up body oils in the process.
I also, unfortunately, cannot wear hand cream!


The threads used before were all types of different threads
with no discernible reasoning —  I used a relatively thin Gutenberg
thread and when necessary, a thin beading needle.

You can see the artists design marks under the beading.

Thankfully the biggest beads and sequins were all there, but for a few areas;
trying to match these sequins is horrendous.
I don’t have stashes of old sequins, and they do have to match perfectly.
Thankfully oOur client had saved beads when she found them.

Loose beads were carefully resecured.


In areas where they were missing, I loosened the surrounding sequins
and repositioned them to cover a hole.
The artist had cut many sequins in the shapes needed at the borders.


Some areas had it all:
missing sequins, loose beads and pearls.


This is a labor of love, literally.
When you estimate these jobs you never quite catch everything,
but when you begin removing and resecuring the beads, you find others,
and yes, I do it all at no further charge.  It has to be done!

Another example of everything in one area.

I had to find matching seed beads;
hat was not too difficult.  I had many of them in my stash!

After I finished the reparation I carefully vacuumed
the entire piece thoroughly through a HEPA filter.
Never before — it is too easy to pull a lose bead.
No wet cleaning was necessary.

I do not write a thorough documentation unless it is paid for
but I pick a few areas and image those for our clients, always.

About the artist, Yves Telemak:

“While still in his thirties, a relatively young age for an established artist,
Yves Telemak became a prominent member of the famous “Bel-Air school”
of flag-makers. The son of a respected vodou priest, Yves began his career
by working as an assistant in the atilye (atelier) of the Bel-Air flagmaker
Joseph “Boss To” Fortine. After learning the craft from “Boss To”,
Yves ventured out on his own. Eager to design drapo Vodou that
expressed his personal artistic vision, Yves transformed a room in his family
compound into a small workshop and began making flags.
Like most premiere flagmakers, Yves makes drapo for Vodou societies,
but the vast majority are sold to tourists and art collectors.
The central motifs of his works are inspired by the religious traditions of his family, suggested by friends and acquaintances, or based on popular images
culled from magazines and tourist brochures. Brilliantly expanding
upon the distinctive styles employed by the Bel-air artists with whom he trained,
Yves’ complex geometric patterns and wide polychromatic borders make
his work the most readily identifiable of any contemporary flagmaker.”

From Haitian Vodou Flags by Patrick Arthur Polk,
University Press of Mississippi, 1997.

 ©MPF Conservation.  May be printed for your own use ONLY,
not for use on blogs without permission.

Posted in antiques, art, conservation techniques, Interim Report, reparation, textiles | Tagged , , , , , , , , , , , , , , , , , | 8 Comments

JBC: White Patriotic Jumper Treatment, Oil Paint


Our White Patriotic Jumper had treatment of his parts:
Treatment, Tail, Part I;
Treatment, Tail, Part II, Treatment, Tail, Part III,
Treatment, Knees and Thighs, and Treatment, Belly Split.
Patriotic was thoroughly Prepared for Finish Work,
and a base coat of  Golden White Gesso was applied.

The White Patriotic Jumper is a sample treatment,
so our client can see the process from start to finish!


This post is about oil painting the Patriotic Jumper!
Remember, his tail was added after base coats
because the repairs were still in process!

DAY 1


Undercoats or first coats
of Gamblin Oil Paints.  A special version of their oil paints were used..

A warm leather color so when the top wears off the undercoat will begin to show.

Layers of thick white oil paint!

The days are not consecutive —
bottom layers have to dry before
another coat is applied.


DAY 2

Saddle, red trims, silver medallion and the yellow undercoat for the corn.

Mixing was done and notes and samples were kept.
The oil paint went into tubes so I had extra for touch-up or another horse.

Anything can apply paint!  Toothbrush was used for splatters.
I wanted a bright coat on top of the leather coat, then splatters of the darker red.
The saddle will wear, and this red, as it wears, will wear in an interesting manner.

I tented the horse for the splatters.  I will be adding many white coats
but it still is a good idea not to have to paint over or remove a color.


Tenting gone, though more painting on the saddle to come!


Red trim first coat, is applied.
Then the yellow undercoat for the corn.
Finally, the silver on the medallion.

Oh yes, another white coat of oil paint around legs and large areas!

DAY 3


The beginnings of his mouth and nose and ears… Pink!

The blue paint is mixed, and the first coat is applied.
Every part gets at least two coats of oil paint,
an under coat and top coat on top of the gesso.

People think I am crazy to use small brushes, but using big brushes
means more touch-up and cleanup, and I am fast with a small brush.
I use a big brush for big areas…
but for detail, it is much easier to use a half-inch flat or #8 or #10 round.

DAY 4


Patriotic Jumper finally got his tail attached!!

To see the posts on reparation of his tail, go here:
Treatment, Tail, Part ITreatment, Tail, Part II,
Treatment, Tail, Part III,

It was a luxury to be able to paint around the tail area with it missing,
but so nice to see Patriotic in his full body!  BIG day!

A trial fitting, and a happy day when all the measuring paid off and everything fit!
The hole was drilled for the screw on the back knee and tail tip.

A few adjustments for a snug fit were made at each end.
Patriotic will never be purposefully washed down or otherwise
doused with water again but in case of a leak or other catastrophe we want
a snug fit so no water can accumulate easily around the joints.

Adjustments completed, the tail was attached.
Mitchell drilled the hole for the screw that goes into the tenon at the top of the tail.
Hide glue was inserted into the mortise holes.

This actually set overnight to cure… So Day 4 stretched into the next day!

Morning the screw holes were plugged.
We want these to be barely visible (ghosted).
IF the tail has to be removed in future the good news is the plugs can be found,
removed, the hide glue loosened, and the screws
removed for a proper repair instead of hammering nails!

The joint was sealed and carved as per the images from
Parker’s other horses and the ghosting of carving on Patriotic Jumper.


The tail before gesso, and after gesso.
Mitchell’s work on the two parts of the tail coming together was seamless —
there is no telltale (pun intended) line across the tail!

DAY 5


More coats on the saddle, including a stippled brown textural coating.

Kate added another white coat on the body.

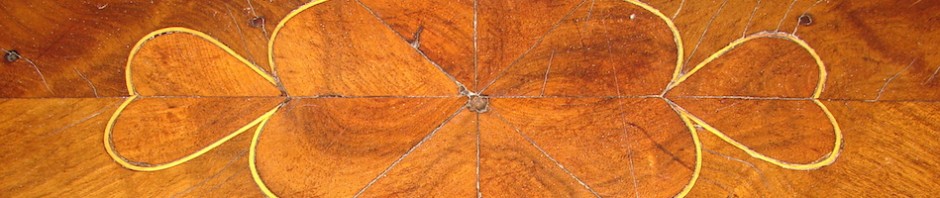
Then Kate made a mistake, and painted the flower on the shield blue;
OOPS!  It should be a sunny yellow…
She wiped it off and would paint over it in a couple of days.


DAY 6

After a bit of the “stubble” of stippled brown pain was knocked off,
the fourth red (glaze) coat on the saddle was applied.


We wanted the metals to look “real” — and Gamblin has wonderful metallic oil paints.
Kate mixed two paint colors to create this warm gold.  It was applied as if
hammered on anything that was large enough to show a texture.
Below, the gold on the shield and the flag stanchions.


Oh yes, sunny sunflower was much better!

The same deeper yellow was the second coat on the corn.
It may not seem like you can see these differing yellows,
but if several coats are used looking INTO a paint job you see more depth of color.
The base coat on the stalks was applied.


Patriotic is looking like his final self now,
though many more coats and details will be applied.

Note: this slideshow is a bit different than the last slideshow:

This slideshow requires JavaScript.

DAY 7

One problem with painting the horses is that the carvings are not consistent.  Above, you can see two different carvings, which makes consistent painting design difficult.

First coats on the hooves, above.

The calico corn gets a thick glaze that is worked into
the dents and lines,
then wiped off.

Interesting fact, that dent corn (which is the manner the corn was carved) is not a calico corn, but these horses were painted in this manner and we are following that pattern.

Finally our sunflower is looking like it should,
and a second coat is placed on the blues.

DAY 8

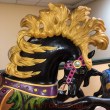
Horseshoes get their silver coats…

… and silver is placed into the tail carvings for emphasis.

DAY 10

The red gets its second coat.

I painted the final coats
on the flag on the
anniversary of September 11,
one of those days where
we know where we were
when we heard the news.

Below, you can see the difference in the second coat of red paint:
glossy and full-bodied!


He is really beginning to look like he is complete…
But not quite!  Nose, ears, muzzle, corn, small touch-ups;
there is still a bit more!

DAY 11

Small details are added… variation in the color of the corn.
Also, the under-color of the leaves was topped with a glaze,
and line-work to delineate the leaves!
See the lovely bright color that comes through the glaze?!

I saved all our color palettes, as they tell so many stories and techniques when you know how to read them, and have actual paint samples on them.

Touch-ups where I smudged…
and a second layer of silver paint…


Small details added, such as line-work over the gold, and in some cases,
a second coat of silver on the stars to make them pop!

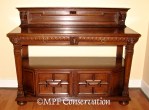
A review of steps, from start to finish,
starting with the Patriotic Horse before we treated him.


Patriotic Horse is Complete!

Follow us for updates on the happenings at the stable!
We will continue to take you behind the scenes!
Search “JBC” or “Jantzen Beach” in our search feature (right) for more posts.
To keep abreast of our post, follow us here or
on Instagram (@mpfconservation) or on Facebook !


Written by Kate Powell  ©MPF Conservation.
May be printed for your own use ONLY, not for use on blogs without permission.

Posted in antiques, conservation techniques, Interim Report, painted objects, pigments, preservation, process, reparation, restoration techniques, wooden objects | Tagged , , , , , , , , , , , , , , , , , , , , , , , , , , , , | 2 Comments

Louis XIV Chest, 3, Veneer and Finish


We move now to Veneers and Finish!

Previous posts on the Louis XIV chest can be found:
1, Woodworking; and 2, Pest Infestations.

Veneer for amendments was created by MPFC ahead of time for the project,
as it was thicker than veneer made today.  It was cut from old stock,
and finished using traditional pure shellac created in the studio with no fillers.


As a teaser, before and after treatment, above.

The chest was covered with beautiful marquetry, but the thick veneer
was lifting, cracked, and sometimes missing altogether.
Our clients wanted the veneer resecured, and larger pieces of missing veneer replaced.  Smaller areas might be treated using shellac burnins and/or hard wax fills.

Some smaller areas could be easily reglued using a hypodermic needle
and warmed Old Brown Glue (pure hide glue.)  However, larger areas where
veneers had slightly warped needed a more secure gluing system, below.

Many large original veneer areas were loose and required an innovative support
to cure flat as there was no way to clamp on the backside.
A backing was built for the chest, shown above and below, right.
In a long day, Mitchell wanted to glue down all the major loose veneer areas.

Veneer was gently lifted (not pried,
as it was loose),and loose debris was removed.  Hide glue was warmed and inserted via syringe and a thin needle —  slipped under the veneer. Veneer was pressed to expel excess glue and wiped clean
before cauling to minimize the mess.

Mitchell used a padded two-caul
system to allow for some soft compression to keep the original veneer from
cracking from pressure.  At each stop,
a board was placed over the cauled area, screwed into the backing.  The front
was gently but firmly clamped to
hold the caul over the veneer securely
flat while the glue cured.

Once the veneers were resecured, small bits of missing wood were cut to fit from
our veneer and similar procedures used to secure the new wood.

Shellac burnins were used as one fill for the missing marquetry pieces.
Above we show the two-color shellac burnin for the lighter holly wood banding.

Hard wax is created from mixing hard and soft colored waxes.
Above, samples of two different areas utilizing hard wax fills.
These are  also excellent to stop future pests from invading.
Below, a corner from start to finish.


Both burnins and hard wax fills were utilized on both
the drawer fronts and carcass sides, as shown above.

The Louis XIV Chest is completed.

This slideshow requires JavaScript.

Written by Kate Powell, ©MPF Conservation.
May be printed for your own use ONLY, not for use on blogs without permission.

Posted in antiques, art, conservation techniques, decorative motifs, Interim Report, painted objects, preservation, process, reparation, restoration techniques, wooden objects | Tagged , , , , , , , , , , , , , | 3 Comments

JBC: White Patriotic Jumper Treatment, Gesso


Our White Patriotic Jumper had treatment of his parts:
Treatment, Tail, Part I;
Treatment, Tail, Part II, Treatment, Tail, Part III,
Treatment, Knees and Thighs, Treatment, Belly Split and Preparation for Finish Work.

The White Patriotic Jumper is a sample treatment,
so our client can see the process from start to finish!

This post is about underpainting
the Patriotic Jumper with Gesso!

Two things were completed in this cycle.
We filled small non-structural cracks with various appropriate filler:
We gesso-ed Patriotic’s entire body in preparation for the oil paint.

MPFC does not know why
so many of the gem
mortices are fragmented, peppered with non-structural cracks and losses.  In some cases it appears the over the life of
Patriotic gem stones may have been replaced, and may not
have been the exact size of the hole, leaving an odd void.

MPFC chose to smooth some
of these areas — all are
non-structural — with an appropriate acrylic putty, shown right and above.

The area around the flower on the shield was degraded, cracked and missing parts.  Mitchell has redefined and re-carved some areas, but you can’t add parts missing in so easily.  The gem areas and the flower body itself were modified using acrylic putty.

If we knew the historic
palette we might return
to it, but that information
is gone.  As part of our documentation, we mixed pigments to match the existing finish for reference.  Also, Patriotic Jumper’s palette is lovely;
we are following the lead
of the previous restoration with minor deviations.
We’d like to make the
metallic paints a bit more
like real gold and silver,
for instance, and paint
real stars on his flags.


Golden’s White Gesso came in a huge tub and looked like thick cream!
It provided a stable topcoat for the oil paint to grab onto and stay put.


The gesso coat reveals any areas we missed in preparation.


Kate tends to detail with a smaller brush before painting larger areas with a wide  brush.  This lays on a thin coat and keeps the carved areas free from buildup.
It only looks like it takes more time, but really, a smaller brush can be very efficient,
with less sanding necessary after the base coat is completed.

Above, his nose is half done!  The pink paint inside his nose and ears
persisted in coming through the gesso until the oil paint was applied.


The tail was applied at a later date for various reasons:
see the tail reparation here:  Treatment, Tail, Part I;
Treatment, Tail, Part IITreatment, Tail, Part III


Gesso is complete; finish work can begin!
Go here for the next step: Preparation for Finish Work.

Follow us for updates on the happenings at the stable!
We will continue to take you behind the scenes!
Search “JBC” or “Jantzen Beach” in our search feature (right) for more posts.
To keep abreast of our post, follow us here or
on Instagram (@mpfconservation) or on Facebook !


Written by Kate Powell  ©MPF Conservation.
May be printed for your own use ONLY, not for use on blogs without permission.

Posted in antiques, conservation techniques, Interim Report, painted objects, pigments, preservation, process, reparation, restoration techniques, wooden objects | Tagged , , , , , , , , , , , , , , , , , , , , , , , , , , , | 2 Comments

Louis XIV Chest, 2, Pest Infestations


The chest of drawers is a seventeenth century French Louis XIV,
shown above after treatment in its full glory.

We continue from the previous post on the Louis XIV Chest, 1, Woodworking.

This post covers samples of
treatment for pest infestation.

The structure was undermined severely in the drawers from
a very old pest infestation.
Some of the damage occurred from poor woodworking repairs; we needed to fill the punky wood and pest holes.  A mixture of Rhoplex® with and without strengtheners was mixed and injected into the punky wood and vacant  bore holes.

The bottoms of all the drawers needed
treatment, as well as the sides, below.

Carcass Damage

The interior of the carcass was treated, with both traditional woodworking repairs,
such as new slides or reparation of near breaks of the drawer supports,
as well as Rhoplex® as needed for pest infestation consolidation.
Before and after treatment, above.

The outside back was also similarly repaired, and all pest holes filled.
Before and after treatment, above.

We move to Veneer and Finish!

Written by Kate Powell, ©MPF Conservation.
May be printed for your own use ONLY, not for use on blogs without permission.

Posted in antiques, art, conservation techniques, decorative motifs, Interim Report, painted objects, preservation, process, reparation, restoration techniques, wooden objects | Tagged , , , , , , , , , , , , | Leave a comment

Textile Conservation: Victorian Tea Cosy, 5, Beading


Continuing from our earlier post on searching for beads…

This post, harder repairs.
Side “A” had many more difficult repairs.

Below is an example of what I shared with our client regarding the worst of her issues on the tea cosy:  rips, missing beads, melted beads, melted beads that melded with
the cotton and linen grid and created a hard “plastic” ridge, especially across the top.


Beginning with that damaged area above:

One of the first things I did is stabilize the areas around the worst problematic repairs.  This gave me a ground of stability from which I can then tackle the worst rips!

In this case, it was developing a protocol and infilling the tassel
(shown upside down above.)  Because of the many missing beads,
I chose a grey bead with a silver lining to add a bit of sparkle that might have been
present in the original beading (we don’t know).  This protocol of tassel will be used throughout the other beaded tassels to add unity to the cosy.  Whenever possible, I tried to use at least one line of the original metallic beads if I had enough to create a row.
These original beads had to have enough gold left on them, and no rust whatsoever.

The toughest repair on Side “A” is just
above the tassel, and involves melted beads,
rips, stabilizing, reweaving, and infill.

Images are labeled, above.  The metal beading that “melted” is so bad it fused,
a phenomena I have seen before with these type beads.
In this case they “melted” into one continuous bar of metal, grabbing onto both
the linen and in this case, some of the cotton batting from the quilting below.

The entire bar of melted beads had to be removed, along with the
linen grid and some of the embroidered “x” embellishment.

I have a good guess as to how these beads “melted” on the cosy:
Tea was made, and a steaming tea kettle of boiling water was mostly emptied but set next to the cosy — or even the extremely hot teapot was set with the spout facing the cosy.  Years of hot steam finally melted the beads, rusting them into the linen weave and breaking them in two or melting them into the bar across the top of the tassel motif.

Oddly, the metal beads are also magnetized!

Warp and Weft and Fill!

In some needlepoint/beaded repairs, a full linen warp and weft would be rebuilt.
Unfortunately, the tea cosy is badly damaged, and so a hemp backing was placed behind the entire piece.  Especially as it is not going under a frame, but back into the tea cosy shape, all repairs are going through the added stability of the hemp backing.  Still I needed to lift a warp and weft up, and fill it so there is no dip in the infill.

Using Gutermann thread, I wove a loose grid.
I used matching embroidery thread to fill the warp and weft, giving it the lift it needed — the “fill” — so that the beads would be sitting atop a solid ground.
The area is ready for beading and embroidery, but…

There are many areas surrounding
the damage that need attention.

There were issues all around the one huge melted repair — small rips where other melted beads existed, and along with them, crystal and white bead losses.

Before I started beading, I decided to stabilize and repair all the smaller rips,
choosing Gutermann threads and/or the embroidery threads, depending.
Ultimately these are holding the piece in stasis until the beading is completed,
because the beading through the hemp backing fill be the final stabilizing repair.

Remember that this tea cosy is not going back into service.
It is a collector’s item, rarely to be used if ever.

I walk you through each step, above, from the stabilizing to the beading.

There are problems associated with these extremely damaged beads and the linen grid beneath.  The first is that it distorts the linen in ways that can make it difficult to bead using the linen as a guide.  Sometimes they distort it so much that it is impossible to even get the linen to lay flat, so there is a bit of a lumpy underlayer and getting a smooth grid of beads over the top can be difficult.

Also, surprisingly, there were different sized original beads.

On a side note, from time to time a bead is melted in place and cannot be removed,
above, without causing more damage to the piece.

The metal beads were not the only beads lost, as we discussed earlier.
I scavenged all the loose crystal beads from both sides of the cosy in order to create one complete side, which was side “A”.  It is interesting to note how different both sides actually were, and I believe they were so from the beginning.  Below, note the
differences even in colored embroidery threads from “A” to “B”.

Note the green embroidery thread in “B”, in the place of the black threads on side “A”?
There were design issues too — they generally appeared the same
but not when you looked closely.  I am not surprised.  This was a hand-made cosy!

Tassel Repair.

I have two more difficult areas where decisions were made.
Some of the warp and weft around the tassel edgings were disintegrating.
You can tell where they were stable or not because my beading might be
a little wonky in the areas where I had no grid!
I was able to save some of the original metal beads in this tassel.

Edging and floral repair.


Here, the edging becomes stable, but as I reach the corners the motif is missing parts.
I decided to save some of the crystal beads for other places and go with the white floral motif, much like what is seen within the body  of the piece.
We have flowers, leaves, and stems.  I chose to go with the gnarled look of the stems, which is what it appeared to do in the body of the piece as well.

There as no clue as to the actual design of the chevron-shaped area at the
bottom of the cosy, above.  I turned them into one of the flowers.

And another oddly difficult area to bead, showing from one side to the next.
I was surprised, but there were intentionally three rows of crystal beads on these dropped motifs.  At first I thought it was my mistake, but the area warranted many more beads.

Side “A” of the Cosy is complete.
Below, I show before and after
conservation and restoration.


Below, some details in a slide show.


©MPF Conservation.  May be printed for your own use.
May be reposted if our url + copyright is used as reference.

Posted in antiques, conservation techniques, decorative motifs, history, Interim Report, preservation, process, reparation, reproduction, restoration techniques, textiles | Tagged , , , , , , , , , , , , , , , , , , , , , , , , , , , , , | 3 Comments

Textile Conservation: Victorian Tea Cosy, 4, Beading


I started on the easier side,
“B” from the previous post
,
but now I move to the side that is
far more damaged, side “A”.


Note: These images are not in chronological order in this post.
We will cover some huge repairs in the next post.

Above, teasers of the before and after treatment in the body of the motif.

As with Side “B”, strategies were created to reproduce even grid lines when the linen underneath the beaded areas resist the process due to rust from the “melted” beads, disintegration or warp and weft, or broken fibers.  One strategy is using several beading needles to line up rows as I bead.  Replacing needles frequently so that you are using sharp needles is important, but I keep dulled needles in a bag for just this purpose.
In the left image an example of lining beads up on older needles;
on the right, notice the areas where the beads simply would not line up due to
the uneven surface.  In those instances, I do my best.

BEADS

From an earlier post, I discussed “burned”
metal beads.  
Throughout each side, many beads are “burned” or “melted” (heat and water/steam damage), but as we tackle side “A”
there are extreme burned areas. Sometimes the melted beads are stuck — that is, I cannot get them to release, and to force the issue might cause more damage to the overall structure.

Oddly, the metal beads are also magnetized!

There were so many missing beads a protocol (strategy)
of use was determined.
The larger crystal beads
were missing in many areas around the perimeter, as
were many metal beads.
These were also needed throughout the flowers, tassels and rope braid motifs.  I decided to remove the
inner layer of original crystal rimming beads (right),
using them elsewhere within the piece. The metal beads were replaced by a well-matched 9/0 sized bead.

“New” crystal beads were also utilized for some infill where needed, especially in tight places, but the problem with the new beads is it made the older crystal beads look
dingy by comparison.  Tiny scratches over time dull the beads slightly.
I was careful where I used the new beads… Betcha can’t find them!

An entirely new grey bead became the inside rim, which you will see later.  I like making the new beads obvious when the design is a departure, not a matching of older beads.  They can then be clearly identified as a new beads within the report back to our client.

I surmise there were two “metal” beads: one which was metal — that is the one that
melted most and was highly magnetized; a second that was glass with a metal lining. The metal disintegrated rusting bead can be lifted easily by a magnet, while the glass bead can be picked up only sporadically with a very strong magnet. The first is the one that so badly disintegrated, and this is being replaced by a
similarly looking antique gold glass bead to the second glass/metal bead.

A third bead was needed for the tassel and the braids, above; I chose a grey glass bead with a silver lining, which allowed for the variety that was once present in the tea cosy.

I wish we knew the exact appearance of the historic design; a best guess
based on the current design and missing bead patterns is the best we can do.
It in interesting to me that all of certain beads are gone,
and I can tell by the pattern of missing beads.
They must have been quite fragile.

The other oddity is the varying sizes.  A 9/0 size is the norm for the bulk of the beaded options, but the original crystal beads are 8/0 sized — which causes problems with the texture of the weaving, though it is no problem around the edging nor in the braided rope holding the tassels.  I don’t think they are newer beads now that I’ve lived with the piece for a long time — but I don’t know why they didn’t keep to uniformity.

Our final new beads were as follows:


Beads to the left are new beads, working within the overall design.
Beads to the right are beads that try to match the existing beads.

Problems associated with these extremely
damaged beads and the linen grid beneath?

They distort the linen in ways that can make it difficult to bead using
the linen as a guide.  Sometimes they distort it so much that it is impossible to
even get the linen to lay flat, so there is a bit of a lumpy under-layer and
getting a smooth grid of beads over the top can be difficult.

INFILL VERSUS STABILIZING

The original yarn colors
were bright green and
bright red! (Note the
back side of the cosy, left.)
I am beginning to think
this might have been a Holiday Tea Cosy!

However, I want to
match the yarn colors as
they are now. Not a
totally easy feat as
they change a bit
over the entire piece,
so I am looking for
a dark red and dark olive
that blends well overall.

Above, stabilizing a small rip with a Gutermann thread, then beading over the top..

Discussing infill yarns
versus stabilizing with embroidery or other threads…

I use two threads to stabilize the ground for beading and strength.  One are Gutermann sewing threads in various colors, shown above.

I also use embroidery threads to stabilize areas which are not yet broken, right.  I reach out into the yarn needlepoint in those areas and add a bit pf stability in a matching color before I bead over an area.

Above, I stabilized an area (which I will document in depth next post)
first in an embroidery thread for strength, but embroidery thread is quite shiny.
I overcast the yarn over the area to give it visual unity.

Of course, there are also many areas where the needlepoint must be infilled.
These dot the entire cosy, both sides, and I reproduce the stitches exactly in those areas.

My client will receive extra yarns and beads to save in the event she needs them in future, thought it is likely the colors may continue to fade over time.

Finally, procedurally, I take notes throughout, above, including how long it
takes me to bead areas.  The latter I do because it gives me more information
with which to do estimates in future.  The former because I can forget what
I did in an area, and this is important for the reports.  When I am in the
“beading zone” I pretty much lose touch with reality around me!

Next post, difficult repairs!

©MPF Conservation.  May be printed for your own use.
May be reposted if our url + copyright is used as reference.

Posted in antiques, conservation techniques, decorative motifs, history, Interim Report, preservation, process, reparation, reproduction, restoration techniques, textiles | Tagged , , , , , , , , , , , , , , , , , , , , , , , , , , , , , | 2 Comments

Louis XIV Chest, 1, Woodworking


The chest of drawers is a seventeenth century French Louis XIV,
shown above after treatment in its full glory.
The drawers are wide and deep, and one can imagine a wealthy woman having a lovely chest to place long full slips and undergarments in with room to spare.

Before and after treatment, above.

To show all the various repairs that go into a piece like this would be monumental;
instead we offer a sampling of the many preservation/conservation
repairs performed on the Louis XIV chest.

This post covers samples of structural reparation.

Veneer was created ahead of time for the project,
as the original veneer was thicker than commercial veneers made today.
It was cut from old, vintage stock,
and finished using traditional pure shellac created in the studio with no fillers.

Top Left Drawer Corner

The top left-facing drawer corner is a good example of a complicated repair:
we show treatment up to the time it is ready for finish, below.
The top corner edge is broken and contains desiccated rubble, possibly some from
an old insect infestation.  The punky structure probably made for an easy break.
Before and after treatment, as a teaser, above.

Right, the right-facing top corner
for comparison.  On the left-facing
top corner the damaged punky wood (rubble) was excavated from
the broken top drawer edge.

The splitting veneers were shaped
for repair with various chisels.

The voids are measured.  Three
different pieces are crafted to be used
in the repair: An angled piece of
drawer; A backing that runs the length of the drawer face; The lip itself.

When these are completed, the pieces are glued using hide glue, and clamped to cure.

The second day, the clamps off, and the various parts are shaped, using carving chisels
and small planes, then sanded with a sanding tool shaped for this application.
Veneer is trimmed for replacement with new veneer.
The pieces are glued using hide glue, and clamped to cure.

The drawer is ready for finish work, which involves matching the color of the shellac.

Escutcheon Mortises

Several screw mounting mortise were enlarged and this left
the pulls to move about, scratching the drawer faces.
The repair involves carefully routing the mortise from both sides
(so as not to damage the veneer), insert matching stair-stepping wooden plugs,
gluing in place, and then carefully redrilling the mortise.
The mortise now hold the escutcheons securely.

We move to Pest Infestation!

Written by Kate Powell, ©MPF Conservation.
May be printed for your own use ONLY, not for use on blogs without permission.

Posted in antiques, art, conservation techniques, decorative motifs, Interim Report, painted objects, preservation, process, reparation, restoration techniques, wooden objects | Tagged , , , , , , , , , , , , | 6 Comments

Flax Wheel


This is a family heirloom, a spinning wheel made for spinning flax.
Our client inherited the wheel and wanted the small piece broken repaired.
It is unlikely that it will be used again, but it has to be strong enough
for someone to move it and not snap it.

Disassembled the part to be repaired.

Simple, straight forward repair, FAILED.

People don’t talk about their failures often, but they should.
We learn from our failures.  In this case, while we knew that there might be a need for a thin insert, the utter inability of the normal repair to hold at all surprised us.
Options like drilling and pinning were not available due to the
fragility of the piece and the size of the small part needing repair.

We decided to create a prosthetic.  We wanted it to be as thin as possible
while still able to guarantee the repair would not fail.

Our prosthetic was designed, and a template taken of the inside curve of the piece.
The wood was bent to fit the inside of the piece.
The inside was lightly sanded to allow for adhesion.
Old Brown Glue, with no additives, is reversible, and this was applied to both sides of the repaired area.  Four hands held it while it was clamped to cure.

Sadly, our finish images were lost (glitch),
but the piece was finished to match the historic finish.

Broken piece before, and after treatment.

Flax wheels are not often seen; we offer our images of the flax wheel, before and after.
iPhone destroyed several days of images in their update.

Written by Kate Powell  ©MPF Conservation.
May be printed for your own use ONLY, not for use on blogs without permission.

Posted in antiques, conservation techniques, decorative motifs, Interim Report, painted furniture, painted objects, preservation, process, reparation, restoration techniques, traditional varnishes, waxes, wooden objects | Tagged , , , , , , , , , , , , , , , , | 2 Comments

JBC: White Patriotic Jumper Treatment, Finish Preparation


Our White Patriotic Jumper had treatment of:
Treatment, Tail, Part I;
Treatment, Tail, Part II,
Treatment, Tail, Part III,
Treatment, Knees and Thighs, Treatment, Belly Split.
When these repairs were completed, we could prep surface repairs and finish.

The White Patriotic Jumper is a sample treatment,
so our client can see the process from start to finish!

This post is about the preparation
of the existing finish in order
to paint the Patriotic Jumper!

In order to repaint the horse, which has suffered many repairs,
the existing acrylic paint must be removed.
Further, the existing paint has issues described below.
This is not a complete stripping, but removing varnish and
top acrylic paints by hand, in order to find the stable acrylic base coats,
meaning paint that is not soft and not contaminated
by the varnish topcoats and deep grime left on the horses.

Regarding this process, in hindsight,
we discovered many issues we had with the existing acrylic paint.

We noted the acrylic was soft in our early testing, above.

Grease and grime from the kids handling and
lack of good maintenance before storing was also an issue.
Note: Remember all items should be cleaned of oily grime before storing.

However, as we investigated the various paint colors on various parts that were unlikely to have been covered with grime, we have to now come to a different conclusion.
The existing acrylic paints were also the problem.
The roof of Patriotic’s mouth, which is not a place children would touch
(less grime factors) and which was not coated with inappropriate varnishes,
comes off in a soft slippery thin coat, and is difficult to sand.


Like all of our repairs up until the actual painting of Patriotic Jumper,
the reparation and abrasions did not happen sequentially.
When Mitchell finished the belly repairs; he began his removal of the damaged
existing acrylic paint while Patriotic Jumper was upside down.

Not many images of the removal and abrasion process were taken.
Some of the initial stages we were in masks due to chemicals used in the process.
Note: We use very small amounts of dangerous chemicals in our business.
Naphtha was used to remove the stubborn varnish and grease from the existing acrylic paint.  Abrasion was used to remove the softest top layers of existing acrylics.

Removal of top coats began with scraping and sanding.
Oddly, the existing acrylic paint smelled damp when sanded, which is very odd.
Wherever this horse has been in past, he’s been in our climate
controlled studio for many months and so we have no explanation for this.
In the second image above, you can see that some of the paint literally popped off,
and this may be because of proximity to the belly and damp wood beneath.

As we were sanding, we wanted to see all potentially compromised joins
in order to seal as we prepped, as shown on the neck, below.
We want to seal all open stable cracks in order for the paint to be smooth,
and also to prevent moisture wicking into cracks.


In one case we found a
reason to insert a keylock, right. The romance rump
was starting to split at a
board join, and what appeared
as hairline crack of no importance under the pain showed that a larger crack was developing, and we needed
to stop that split in two
boards before it grew and undermined a completed horse’s finish several years down the road. Painting was delayed while a keylock was carved into the rump.

The stars used in the
last restoration were surprisingly gummy
stick-on stars, and
they were coming off, right.
We removed all the
stick-on stars, and will
replace with painted stars.
The stick-on stars were
placed over areas where
there were indentations in the wood.  It doesn’t make sense that the stick-ons did this, so we are uncertain as to the history of the indentations.
The bumpy star indentations also were removed, above.

Various methods of paint removal were utilized to get into the crevices,
and the sanding itself is difficult work.  Hand-sanding is necessary as motorized sanding
is not gentle and it is extremely easy to over sand and dig down into the wood.
Hand carving and scraping tools were utilized.

In most cases, only soft acrylic paint was removed,
except in areas were woodworking treatment was performed.

Patriotic Jumper is a century old, and in some areas carving walls have
diminished or fragmented, or walls around gems have splintered.
Mitchell cleaned up fragmented walls where possible,  Above, he carved a bit around the flower on the shield, where the carving edges were tattered and nearly invisible.

An example of our paint removal, before and after, above.

The manes can be wildly flowing and difficult: using a carving tool
is one of the easiest ways to remove the paint in the grooves.
It just takes a light touch not to dig down too far!

Ears, eyes, nose, teeth…

Finally, we polished the gems.
Some of the gems were terribly scratched by some sort of abrasive.

This slideshow requires JavaScript.


He is fully prepped (tail to be added later)!

Gesso, the first step in finish work can begin!

Follow us for updates on the happenings at the stable!
We will continue to take you behind the scenes!
Search “JBC” or “Jantzen Beach” in our search feature (right) for more posts.
To keep abreast of our post, follow us here or
on Instagram (@mpfconservation) or on Facebook !


Written by Kate Powell  ©MPF Conservation.
May be printed for your own use ONLY, not for use on blogs without permission.

Posted in antiques, conservation techniques, decorative motifs, Interim Report, painted objects, preservation, process, reparation, restoration techniques, wooden objects | Tagged , , , , , , , , , , , , , , , , , , , , , , , , , , | Leave a comment

JBC: White Patriotic Jumper Treatment, Belly Split


Our White Patriotic Jumper has repairs to be made on the tail,
the tail-to-leg connection, all four legs, and his belly.
When these repairs are completed, we will treat surface repairs and finish.

The White Patriotic Jumper is a sample treatment,
so our client can see the process from start to finish!

This post is about two splits: belly and rump!

Before we began the repair, we had no idea of the reason for the belly split;
we assumed they were split due to chemical stripping, however,
as we began the repair the evidence suggested a water event.
When you tie in the dry rot around the tail, then plausible reasons can be surmised:
1) Patriotic lived outside for a time during his long life;
2) At one time, excessive water was used during cleaning and not thoroughly dried.
An over head leak is also possible but the storage facility showed
no evidence of a leak overhead where Patriotic sat for many years.

Mitchell was to do several keylock repairs, which are excellent
woodworking repairs to halt degradation of a split.


Mitchell looked at different layouts to cover the split;
In the end we settled on two on the tail end, to cover the larger end of the split,
then further out to stop the split from continuing;
and one to three on the head end, for the same reason.

Mitchell wished he could have saved time using a plunge router, but
with the curvature of the belly and the unknown nature of what
we might find, he decided to hand-chisel the keylock mortice.
It was, in the end, a very good thing, because of the surprising
degradation of the century-old horse.

Mitchell began cutting the first keylock toward the rear, and we discovered the wood was punky. Not quite rotten, but as if it had endured being waterlogged. It was difficult to maintain a straight wall along the edge; the wood crumbled instead of cutting clean. We treated the inner walls of the keylocks with a museum product to strengthen them; even so, when the first keylock was cut, inserted, and tapped, a portion of the softer wood cracked, causing more repair work with the old wood.

This precipitated larger keylocks
all along the belly splits.

Moving toward the head, the same process was used, however, there was a bit less water damage evident.  Two nice keylocks sufficed to stop the split from moving further.

Along with the belly split, we conserved the bolts that tie
the iron pole plate the horse secures onto the belly of the jumper.
We had not initially planned to do this, but with the potential issues around
water damage, this was a preventative measure.
Holes were redrilled and plugged using hard wood dowels,
then the bolts were replaced into tight fitting bolt holes.


The belly repairs are completed…
Finish work can begin!

Follow us for updates on the happenings at the stable!
We will continue to take you behind the scenes!
Search “JBC” or “Jantzen Beach” in our search feature (right) for more posts.
To keep abreast of our post, follow us here or
on Instagram (@mpfconservation) or on Facebook !


Written by Kate Powell  ©MPF Conservation.
May be printed for your own use ONLY, not for use on blogs without permission.

Posted in antiques, conservation techniques, Interim Report, preservation, process, reparation, restoration techniques, wooden objects | Tagged , , , , , , , , , , , , , , , , , , , , , , , , , , | Leave a comment

Textile Conservation: Victorian Tea Cosy, 3, Beading


Continuing from our earlier post on searching for beads…

The cosy has two sides, arbitrarily labeled “A” and “B”
for reporting and discussion sake in the report.

Some of the areas of the tea cosy have disintegrating linen warp and weft,
or loosening warp and weft, shown above left, where is becomes unstable and unruly.  Reweaving is difficult due to the beading interspersed around the edges;
there are bare holes in very small areas.  Further, there are beads which are loose but have not fallen off.  I chose to back the entire cosy with an organic
undyed unbleached woven hemp.  I can then bead and stabilize into the hemp below.

Another issue are what I call “burned” metal beads, shown in details above and right.  I in the right image above, lower right quadrant of the image you can see gold, pewter, hematite and crusty rusty looking beads; these are heat and water/steam damaged beads.  See the darkened red yarns, right?  This is not dirt stain but the residue of the heat damaged beads.  I would love to remove some of these beads, but the most damaged of them are welded to the warp and weft.

I have seen this exact melted or burned beads in other Victorian pieces.
One of the first beaded pieces I treated in Portland had several areas so badly
“burned” that it ripped the warp and weft in two… to reweave I had to cut out some of the melted beads to remove.  They no longer looked like beads but melted metal!
I rewove the ripped missing areas in order to have a good base to reweave new beads.

My goals for the tea cosy are to surmise the the design in areas
for which I have no historical record for — which means by looking
at the two sides I do not have a whole motif.
I will infill with appropriate appearing beads and to stabilize loose beads.
Not every bead will be stabilized — some are not loose — and that would be
a very expensive endeavor and this cosy will not be used as it once was,
but treated carefully like the Victorian lady she is!

When the two sides have been beaded and stabilized,
I will clean both pieces (I cannot do this now with so many beads loose),
infill yarns as necessary, create the quilted interior and ruched ruffle,
and reconstruct the tea cosy with the new quilted interior and silk ruched ruffle.


Step one: tack the
tea cosy onto the hemp backing.

I built a frame and taped the backing into place, then loosely tacked in six places.
I will start beading in the center and move outward evenly, in order to ensure
I do not have areas of gap or bunching in the hemp under the beading.


Beading begins.

The first day there were experiments with the various beads,
so it was slow going, and more than once I removed my beading.
I don’t know if there was a bead that was lost, but every so often I find
an oddly placed clear bead in the center of white,
leading me to think that the edges of the petals were not all white.


Also, in areas such as this petal, where the warp and weave below is not stable
but loose and uneven, I take the time to understand the bead weave as I go.
A second or third beading needle is used to align and study the weave
and hold beads in place as I stabilize around them.

Different sized beads.

I am encountering several areas with different sized beads,
both on the edges of motifs and sometimes in the center.
I don’t know if the cosy was repaired once before, but nothing tipped
my mind in that direction as we excavated the various pieces.
I may never know.

For now, I am labeling them when I note them “original bead” and “larger bead”.
I am sure the bulk of the original beads were the smaller size, between a 9/0 and 10/0;
the second size looks to be an 11/0.  My new beads are all in that size range.

Examples of stabilization as I bead.

Most of the time I am
picking up one bead at a time to stabilize by re-threading them to the hemp below, above. In the last image note I am setting a row in place as I stabilize a very loose beads one at a time.  Occasionally an entire area, such as the tulip-shaped flower right, needs stabilization and alignment. All the beads are loose but not falling off.  I might pick up several beads in a row,
then come back and tack the thread down in between.

Above, the area completed
on the first day. I can’t bead for more than an hour at
a time
, and when I get up
from focusing on beads
for that long it is a little
like being tipsy as my
mind and eye adjusts!
I added one new bead to
the design, a milky bead
that picks up and refracts
light at the edges.  A string
of new white beads, though well matched, was simply
too much flat white.
By adding the milky white bead it softens the edges.

I take notes throughout, above, including how long it takes me to bead areas,
because it gives me more information with which to do estimates in future.

This posting serves as a treatment report, to keep with the other documents of the tes cosy in her collection.  Our client will get copies of this and maybe my illegible notes!
A vial of the new beads will also be sent to my client for any possible repairs in future.

Will post as I progress!

©MPF Conservation.  May be printed for your own use.
May be reposted if our url + copyright is used as reference.

Posted in antiques, conservation techniques, decorative motifs, history, Interim Report, preservation, process, reparation, reproduction, restoration techniques, textiles | Tagged , , , , , , , , , , , , , , , , , , , , , , , , , , , , , | 4 Comments

JBC: White Patriotic Jumper Treatment, Knees and Thighs


Our White Patriotic Jumper had repairs to be made on the tail,
the tail-to-leg connection, all four legs, and his belly.
When these repairs were completed, we could treat surface repairs and finish.
The White Patriotic Jumper is a sample treatment,
so our client can see the process from start to finish!

A PROCESS STATEMENT
REGARDING ALL KNEE JOINTS

We will show images at the bottom,
after the written description which applies to all knee joints.

All four knee joints on the Patriotic Jumper are crafted as face butted, scarf joints.
The knee to thigh components are secured with two large wooden pins bisecting the joint’s walls. Hide glue originally kept the join surfaces tights and minimized flex.

Prior improper repairs (which we surmise were intended as temporary) over
Patriotic Jumper’s entire life, ultimately caused greater damage.
The worst were multiple nailings which bisected the joints,
probably in hopes of stabilizing the ever increasing loosening at the knees.

The joinery’s join lines have shrunk along their shoulder butts
(where the knee portion fits along the thigh line). In some cases
degradation of paint allowed moisture to erode and shrink the joinery element.

At some point, an attempt to camouflage the widening gaps between the joinery shoulders was performed by troweling composite into the voids.  The introduction of these materials were purely cosmetic and did nothing to rectify the structural problems. In fact, the introduction of some of these composites interacted with previous fills, especially those filling materials which contained grit.  Theses continually sifted into the worn wood, increasing gaps, tattering substrate and contributed to further loosening of the joints.

MPFC’s task relative to the leg joinery, was to rectify the looseness of the joinery without damaging the historic joint in the process.
The buried nails were a daunting problem!
When we considered disassembling the joint and recognized
each connection contained at least four 12 penny countersunk finish construction nails,
we began to look for alternatives to taking an invasive approach (disassembly)
because of the inevitable destruction to invasive approaches of the repairs,
especially as it related to extraction of the buried nails.
The process of removing these nails in order to gain access to the joint would certainly break and splinter elements of the joint through the process of prying and leveraging,
and probably would create large gouges in the joint walls and exterior surfaces.

So, what to do?

As in all balanced paths we settled upon the middle one:
we opted not to disassemble the joinery with all the risks to the elements which would occur through the extraction process. We favored traditional, common sense woodworking repairs which amended the losses along the joinery shoulders and corrected the instability
and the ongoing flex of the joint. Our first task was to remove the accreted rubble
clogging the voids adjacent to the sifted joint shoulders. How to do this without causing more damage and enlarging the already expansive voids?

Thank goodness for Japanese saw blades! Their precise teeth and thin blades allow
for fast and precise cuts. Note the steel which comprises the tooth edge on these
expensive blades is generally quite brittle, which translates as broken teeth if one
hits nails or hardened rubble. We lost several expensive blades withing
a few strokes due to undetected nails (see outside back front leg below).
I knew the hazards before I started and had made my peace
with the destruction of the tool in favor of the results in precision.
The shoulders were cleaned and the kerf lines established.

We created the splines and veneers from tulip poplar (same wood species as the original components) which I cut on the band saw. Because each void was slightly different in girth, even though my saw blade was precise, not one size of spline would fit all voids.
I needed to create multiple widths of splines in order to achieve a proper fit
(which can be saved and used on other carousel horse applications).
After cutting the amending splines in multiple thickness I customized the widths to fit the disparate joint shoulders by trimming them.  Occasionally more than one spline per joint line was glued to modify due to diminishing shoulders on the joint.
This was done strategically using leverage within the shims by tapping the wood between two layers in order to create tension in the absence of the availability to clamp. Ultimately, each shoulder line returned to a tight fit through the simple introduction of leverage.

Finally, I mixed a “hybrid” glue which has bulking qualities, flexibility
and excellent sheer strength along with the potential of reversibility if
one wants to dissolve the bond and introduce further repairs in future.
Note: One does not want to rely upon glue to replace structure!
Glues of all types are notoriously poor relative to maintaining strength
when one attempts to use them in place of proper woodworking solutions.
I made certain the voids between joinery surfaces were filled with wooden splines
with little tolerance between joining surfaces so that the glue would simply act as the ‘tacking’ medium, rather than adding structure. To that end,  I brushed all fresh and historic surfaces with thin layers of our customized glue then installed
the fresh splines and veneers. After waiting 24 hours the splines were trimmed to
historic surfaces, shaped, then made ready for gesso and paint.

Having described the process, above, we will show each leg, below.

ROMANCE FRONT LEG

OUTSIDE BACK FRONT LEG

OUTSIDE BACK REAR LEG

TO VIEW ROMANCE REAR LEG
(WHERE TAIL MEETS LEG, VISIT HERE)

This join was discussed under the Tail Reparation:
image below after priming with gesso and before tail was attached.


The belly splits are repaired next!

Follow us for updates on the happenings at the stable!
We will continue to take you behind the scenes!
Search “JBC” or “Jantzen Beach” in our search feature (right) for more posts.
To keep abreast of our post, follow us here or
on Instagram (@mpfconservation) or on Facebook !


Written by Kate Powell  ©MPF Conservation.
May be printed for your own use ONLY, not for use on blogs without permission.

Posted in antiques, art, conservation techniques, decorative motifs, Interim Report, painted objects, preservation, process, reparation, restoration techniques, wooden objects | Tagged , , , , , , , , , , , , , , , , , , , , , , , , , | Leave a comment

Washington State Flag: Painting

We left off with eyes following me around the room, above, and a day of oiling out.

The background is a blend from left to right of
phthalo, sap, olive, and chromium greens,
as we illuminate George from behind on the right side.

The first coats of his jacket are on, moving between two blends,
a darker blend to a bright blue blend,
and his eyes begin with the brighter blue in their first coat.

Note the difference in brilliance as the paint begins to cure…
It will darken even a bit more as the days wear on.


A second deepening coat of blues will be added before I write again.
While I blend oils as I go, I am interested in
applying thin layers to avoid a highly textured painting.

Know that the subtle shadings of colors from one blank to the next is due
to the artificial versus natural light in the room when photographed,
and fresh paint is much brighter than after it is cured…

Next post, here.

To begin at the beginning, visit Washington State Flag, 1.

©MPF Conservation.  May be printed for your own use.
May be reposted if our url + copyright is used as reference.

Posted in antiques, decorative motifs, Interim Report, painted objects, process, reproduction, textiles | Tagged , , , , , , , , , , , , , , , | 1 Comment

JBC: White Patriotic Jumper Treatment, Tail, Part III

Our White Patriotic Jumper had repairs to be made on the tail,
the tail-to-leg connection, all four legs, and his belly.
When these repairs were completed, we could treat surface repairs and finish.
The White Patriotic Jumper is a sample treatment,
so our client can see the process from start to finish!

We continue our documentation of the tail from
White Patriotic Jumper Treatment, Tail, Part I; and
White Patriotic Jumper Treatment, Tail, Part II.

Please excuse the grainy grey images in the woodworking rooms;
the yellowed lighting creates an odd discoloration.
Note that a lot of explanations are under the images themselves!

TAIL BREAK

The tail was originally secured
to the rump and the romance ankle using screws which penetrated the tail tenon in the rump and the tail tip to romance ankle at the tail’s bottom. The rump to ankle connection ensures the stability of the long tail. The inclusion of steel pins (16 penny nails which had been cut to an advantageous length, shown above), enabled the joiner the ability to flex the two parts of the tail in order to line up to their liking then amend the tail appropriately if there were discrepancies.  Once line-up occurred, the carver could amend whatever voids might exist between the two pieces, glue the additional piece into place, then carve the amendment to match surrounding area.

Examination of the American Patriotic Jumper’s tail prior to excavation shows
anomalies around this joinery surface which are aesthetically consistent with multiple poor repairs and subsequent losses to the carved substrates.  Proper reparation of this point in the tail allows us to reestablish those historic carving elevations which will,
in the end, look as they did when Parker originally carved the tails.

MPFC did not anticipate dry rot in the tail to knee connection!

Apparently water collected in the crevice of the tail to ankle connection, causing the rot.
Possibly early on they hosed down the horses to clean, or
perhaps they were outside for a portion of their life.
The tail-to-ankle restoration project became exponentially larger in scope.
Both the tail tip and the ankle exhibited losses.
The ankle from rot and losses and improper screws and putties:
severe rot in the tail tip, both in breadth and depth, especially within the tail tip.
This meant a great deal of desiccated and splintering historic wood substrate had to be strategically removed from the surface and core of the tail and ankle without disturbing the essential function and aesthetics of the tail and it’s connecting parts.

During the excavation process MPFC was able to discover that the tail was originally screwed to the ankle.  Iron oxide tracings wicked deeply into the ankle, tell its story.

Losses are found in the upper tail joins due to wear and multiple damaging repairs.  Shifts in the tail tenon and rump mortise trajectory and shifted angles caused the repaired tail to be a bit shorter than was needed.  In order to mitigate this shortage we created a spline from tulip poplar and secured it within the tail tip join which then allowed the tail to extend completely to the ankle as was originally intended.

This addition join and tip were carved so that,
once painted, it will not be noticeable.

ALL TAIL PARTS TOGETHER

We did not apply the tail until after the first coats of paint were applied,
which is why you won’t see the tail back onto the horse until the finish stages.
Repairs all took different times and we moved on in finish work so that the inside
of the back legs could be easily painted without a tail inserted.

The tail is a monumental repair in that it was a hard repair.
No right angles make it difficult to secure and work on parts.  Most of all,
the missing parts did not allow a template for how the tail would go back together.  Meticulous work on Mitchell’s part, and fittings
testing back and forth on Patriotic Jumper ensured that the tail fit!

The tail attached, then loosened so that minor shims were
added for a close fit against the body proper.

Screws with their plugs ensure that the next time the tail must be repaired,
the plugs can be removed, the screws unscrewed,
and whatever repair might be necessary performed properly.
There will be no further need for poor repairs  —
no more 3-penny nails sunk into the tail at cross purposes, or gunky putties!

Finally, cuts showing tail hairs were redefined,
as this was the way Parker originally designed the tails.


The final test?  A coat of gesso.  Putting a coat of paint on a repair
tends to show every anomaly.  This repair does not show!

The completed tail is ready
for the final coats of paint!

Follow us for updates on the happenings at the stable!
We will continue to take you behind the scenes!  Currently we have:
Jantzen Beach Carousel Moving Day!
The Jantzen Beach Stable is Full!
Good Monday Morning!
and many others!
To keep abreast of our posts, follow us here or
on Instagram (@mpfconservation)!


Written by Kate Powell  ©MPF Conservation.
May be printed for your own use ONLY, not for use on blogs without permission.

Posted in antiques, conservation techniques, decorative motifs, Interim Report, painted objects, preservation, process, reparation, restoration techniques, wooden objects | Tagged , , , , , , , , , , , , , , , , , , , , , , , , , , , | 12 Comments

Textile Conservation: Victorian Tea Cosy, 2, Beads


Continuing from our earlier post…

The difficulty in finding beads to match vintage beads is astounding!
Clients and those creating new works are unaware that every day our commerce is trying to save cash by only stocking what is popular.
It is nearly impossible to find beads locally, and in the end all my beads
for this project came from small vendors scattered throughout the world,
from England to the Czech Republic to the USA.
I give thanks to the puter daily because it was even harder 30 years ago.

I started with color and size.

Color, mostly glass: just off white (somewhat matte or semi-gloss,
and probably were once very bright), black (gloss),
clear with a silver interior (not rainbow or gold lined clear),
4 shades of grey (hematite-ish, silvery-grey, light clear, and a milky grey), gold, and a metallic bead which melted (more about that later) and morphed into several colors.
My goal is to match they way they look unless I can find the actual bead —
and assuming the actual bead will look correct on a piece that has heat damage.

Size: Here is our first hurdle.
Seed beads today are usually sold in 8/0 or 11/0.
Unfortunately, most vintage items take a 9/0 or 10/0 bead.

First I bought several bags of beads in the 8/0 and 11/0 sizes which matched our vintage beads, success in color.  (I can always use these beads in my own beading project.)
For my purposes, it allows me a description if I need to discuss beads with vendors
around the world: “Is this color similar to ‘insert common bead name here’?”

I actually tried many of the 8/0 or 11/0 beads in the project, to see if I could use them.
Nope.

So began the hunt began for the right color in size 9/0 or 10/0.
I have more success with Etsy looking for vintage beads, but it still takes several searches over a couple months, because new lots come in and are posted, and then sell out.


Four dozen bags or tubes of beads later I began to whittle down to the hard-to find beads.  These tend to be bolder, and shape becomes an issue.

Example, the white beads stand out on this piece.  Modern white seed beads
are typically rounder, not irregular, and bright, many appearing almost plastic.
These white beads MUST be the right size, and
if possible I want to find beads that do not all have the uniform machined look and rounding, but appear to be handmade, as were the original beads.
(See more on white beads at the bottom.)


Matching appearance: There is a metal bead that was heat damaged
and this damaged bead looks gold, red-brown, and hematite.
Substituting this bead will be tricky, because I can’t remove the melty
vintage beads in many cases — they are fused in place.
My strategy will be to find 2-3 beads that I can use together to create the
appearance of the field of metal beads, so the new don’t stand out.
I had success with a mix of vintage and new beads which will be good substitutions, above,
even though they are not the exact vintage bead.  The color and shape and size
are close or even correct, however, they are new, not old.


But damn the white beads…
Seriously, WHITE BEADS… I now have a dozen bags of white beads
and not one of them is correct, and I want to get started.


One more check on Etsy — and the hope of success!
I found VINTAGE white beads from a dealer in Seattle, House of Twinkle!
Arrived today, and while they are not perfect, they are the closest I’ve found.
They are vintage beads from the Victorian era, and if I choose the largest beads
from the package such as they sixth and seventh bead from the left, above,
I think they will work.  it is time to have the project move forward with these beads!

Update addition:  Some beads arrived from Europe in 9/0 and 10/0 sizes
and many are wonderful beads for this project!

I will start beading today (next post)!

©MPF Conservation.  May be printed for your own use.
May be reposted if our url + copyright is used as reference.

Posted in antiques, conservation techniques, decorative motifs, history, Interim Report, preservation, process, reparation, reproduction, restoration techniques, textiles | Tagged , , , , , , , , , , , , , , , , , , , , , , , , , , , , , | 11 Comments

Washington State Flag, Oiling Out

Note: The images are at an angle so the powdery textures and oil can be better seen.

Taking a break from painting George to discuss a procedure
that will be performed on the finished product, and the testing day.

We choose oil paints for their pigment, which means sometimes
balancing has to happen in the form of “oiling out”.
Oiling out is to add a layer of medium to the top of the paint,
let it sit for a few minutes, and then wipe it off again.
Sometimes this has to be done more than once to balance.


I noticed that a powder had formed in certain areas on both the text images on paper,
and on the silk images which were fully cured, mostly in the greens and one blue.
(I rubbed my finger across the top of the powdery residue, above.)
In some of these it had happened suddenly, so perhaps the drying time combined
with the change in weather made the unbalanced areas appear stronger.
Having never oiled out on silk before, I tested it on the silk test image.


Oil mixture was wiped on the left-hand side,
allowed to sit for a few minutes, then removed…
See the radical difference from the left-hand side to the right above and below?
Now it will be allowed to cure for a couple of weeks
and we can see if a second treatment needs to be performed.

Above, detail of the oiled out area, left, and the powdery residue on the right.

I also oiled out the paper test images; what a difference!

This process will slow down our ability to sew the silk immediately.
We will let the paint fully cure when finished for a couple of months,
then oil out the blanks before sewing the finished flag.

Meanwhile, we continue to paint George on the flag blanks!

Know that the subtle shadings of colors from one blank to the next is due
to the artificial versus natural light in the room when photographed.

To begin at the beginning, visit Washington State Flag, 1.

©MPF Conservation.  May be printed for your own use.
May be reposted if our url + copyright is used as reference.

Posted in antiques, decorative motifs, Interim Report, painted objects, process, reproduction, textiles | Tagged , , , , , , , , , , , , , , , , | 2 Comments

Washington State Flag: Prepping Flag Blanks


We left off with my final finished draft on silk, above.

I wished I’d take a photo of the room with the green silk along one wall —
Beautiful color to work in for the next two months of painting!

I went from my intimate small studio with many references around,
to the expansive one above, an open space with lots of light.
The original George Washington State Flag at one end is now my main reference.

Know that the subtle shadings of colors from one blank to the next is due
to the artificial versus natural light in the room when photographed.


Three new templates were created for the three blanks,
because over the next few weeks they will be traced upon repeatedly.

Those tracings were pinned into place and a white chalk transfer was created,
labeled #1-#3.  Only one, the best one, will be chosen for the flag.
The other two are insurance in case paints are dripped or a brush is dropped.

Painting upright like this under these conditions is not easy.
Painters slop paint, drip paint, and most of the time it is correctable.
But not if it drips on this silk!
Further protocol is washing my hands two dozen times a day,
because if I touch my skin I might get oils on the silk.
All paints and liquids are stored across the room or below the spill line,
so that if they get knocked they hit the floor, not the silk.
Our blue ®Sterilite storage bins are doing double duty now as lifts to level the blanks
at the right height for comfort painting, and as a place to set a reference.


The transfers at this stage were difficult to trace,
because the darker green line of the PVA was hard to see through the layers.
In a few areas the edges of the transfer was too close to the PVA edge, shown below.
If any oils came into contact with the silk, a stain of oil will spread onto the silk —
again, think grease stains as the paint oils separated.


See the wonky edges on panel #3, directly above?

With a textile vacuum we removed both chalky droppings from the surface of the image so that they did not drop onto the silk itself, and also removed as much of the chalk outline at the edges that were problematic, in image one, above.  Using PVA, I balanced the primed areas so that edge was not in danger of oil paint coming into contact with silk, below.


The first and trickiest area was to establish the outer edge with the
first layer of warm grey paint using the faster drying medium.
On the rest of the medallion, if I fudge I can correct it, but not on the border.
Three days later I added the second layer, and the difference is shown above.


Painting upright like this under these stressful conditions is not easy. Painters slop paint, drip paint, and most of the time it is correctable, but not if it drips on this silk!
Further protocol: I washed my hands two dozen times a day, because if I touch my skin (brush a hair out of my eyes, scratch my face) I might get body oils on the silk.
All paints and liquids are stored across the room or below the spill line,
the bottom of the blank, so that if they get knocked over they hit the floor, not the silk.

Eyes added, I simply had to, and George begins to come alive!
All three panels are a bit different in their sketches.

We discuss Oiling Out next.

To begin at the beginning, visit Washington State Flag, 1.

©MPF Conservation.  May be printed for your own use.
May be reposted if our url + copyright is used as reference.

Posted in antiques, decorative motifs, Interim Report, painted objects, process, reproduction, textiles | Tagged , , , , , , , , , , , , , , , | 4 Comments

Washington State Flag, Third Drafts, Silk

We left off with my first finished drafts
on silk, above.
  I learned a lot… and now I had to move into true oil painting,
taking advantage of the slow drying
of the oil paints to blend, and having
a greater understanding of the problems
of painting on silk. It was time for me
to blend and finish these test pieces.

Again, I started with the circle.

I also worked out the lettering + border.

The white circle took two coats of the Titanium Zinc White to cover.
Titanium Zinc was chosen as it is a very bright white to mimic a lead white,
but is not as brittle as Zinc White.  I traced my lettering and tried our gold paints,  comparing both against the original.  Neither the Titanium White border
nor Pale or Rich Gold from the tube was just right.

It is hardest to duplicate a finish that has aged, whether shellac or paint.
Years of environmental factors created the color we perceive, not pigments.
Also, many pigments from years past are now illegal, and so hard to obtain,
though conservators can purchase them for reparation on damaged paintings.
This reproduction did not qualify for mixing the older pigments,
such as a lead white, for both cost reasons and also toxicity.
And, our pigments are against the original color of the silk,
emerald green, not the faded silk of the original flags current state.

I mixed Titanium White going into a warm cream by adding Titanium Buff,
but that was not the direction with pigments;
then finally mixed a warm grey that was right, and batched a small tube of that formula.

The golds available needed to be bright, warm, and crisp. Mixing the two “golds” was a start — the rich gold was creamy and the pale gold, a bronze, bright. I added a bit of ocher to further warm and darken. This was batch mixed, placed into a tube, and sealed.

I completed two more test runs on silk, one without the border, above,
where I worked more on finishing his face…
and one with the border, above left and below.  On the second is face is left rough.


My studio would transform in order to create the large pieces for the flag, next post!

All paints are Gamblin Oil Paints, made in Portland Oregon.

To begin at the beginning, visit Washington State Flag, 1.

©MPF Conservation.  May be printed for your own use.
May be reposted if our url + copyright is used as reference.

Posted in conservation techniques | Tagged , , , , , , , , , , , , , , , | Leave a comment

JBC: White Patriotic Jumper Treatment, Tail, Part II

Our White Patriotic Jumper had repairs to be made on the tail,
the tail-to-leg connection, all four legs, and his belly.
When these repairs were completed, we could treat surface repairs and finish.
The White Patriotic Jumper is a sample treatment,
so our client can see the process from start to finish!

We continue our documentation of the tail from
JBC: White Patriotic Jumper Treatment, Tail, Part I.

Please excuse the grainy grey images in the woodworking rooms; the yellowed
lighting creates an odd discoloration and makes Mitchell’s hands look black!

Note that a lot of explanations are under the images themselves!


TAIL TO KNEE

The tail to knee gathered water, which caused dry rot.
It means that at some point in Patriotic Jumper’s history,
he was covered with quite a lot of water, and not dried off.  Regularly.
*If there are carousel owners reading this, beware!*
Again, this meant more work than anticipated, and the rot was not detected under the thick paint.  The rot had to be removed and the wood replaced for a strong connection.

The two areas to be repaired were the tail tip, the knee itself.
After these were repaired, the tail could be reunited with our horse!

TAIL TIP

The repair took several steps.  The first was to remove all the rot, and the rot went surprisingly deep — more than one inch into the tail structure.
It appeared that over time some workers had tried to repair the tip
without looking at the cause of the problem, more common than you’d imagine.
Glues were mixed with putties and the crumbling rot, seen in the first few images above.

We located what is likely the original screw hole, going through the tail into the knee.

It took patience to remove all the rot.

The next step was to insert fresh wood of like species into the rotted area; all the while maintaining a viable structural unit which would be able to withstand the rigors of opposing tension and flex which will be asserted over the next many decades of service.

A mortise was created and a precisely corresponding wooden insert fashioned to set into the mortise.  In image two, virgin wood is revealed and iron oxide is discovered, proving that the original tail tip was anchored to the knee through the convenience of a screw.

The mortise floor is planed and chiseled to present vertical to the spline,
images three through six.  Hide glue with gap-filling PVA is applied,
and the block is inserted, clamped and allowed to cure, images seven through nine.

The tip itself was diminished and needed augmentation to attach properly.
Before the second block was attached, the attached black was trimmed
to accept the second block, and the block itself was fashioned,
then glued as was protocol in the step above, and left to cure.

After curing, the tip was grossly carved to ease the final carving and fitting.
Adding physical structure to the tail tip in order to satisfy the loss of tip structure allowed us to gain proper purchase in connecting to the knee.

ROMANCE KNEE REPARATION

The knee also had dry rot and structural losses to the surface substrate
which connected to the tail structure.
The rot inside the knee had to be removed and replaced.
A large section of loss which extended into the knee was adjacent to the primary connecting points of the leg’s thigh to knee scarf joint.
The structural integrity of the joint had been undermined with several previous repairs.  The integrity of the joint was of utmost concern for us when devising a plan by which we could recreate a reliably strong connection to accept the repaired tail to knee join.

Two sets of repairs were done concurrently to strengthen the knee.

The first was to work with the dry rot within the knee, which was excavated.
A mortise was set into the knee to accept the fresh piece of tulip-poplar.

During the mortise excavation we were able to conclude, with confidence,
that the tail was originally secured by screw to the knee.  The discovery of iron oxide deposits well into the depth of the knee matched those we saw in the tail tip, above.

A block was crafted to insert into the mortise, then shaped to historic surfaces.
After the glue cured securing the block within the mortise the piece was shaped to historic levels, insuring a proper foundation by which the tail can be re-secured to the knee.

Small losses from prior repair failures were filled,
including two crafted splines to shim the knee joint and prevent it from flexing, above.  Veneer shims of tulip poplar were made to fill loose gaps.

The knee was ready to accept the tail!
Soon to be posted, the final reparation of the
White Patriotic Jumper Treatment, Tail, Part III.

Follow us for updates on the happenings at the stable!
We will continue to take you behind the scenes!  Currently we have:
Jantzen Beach Carousel Moving Day!
The Jantzen Beach Stable is Full!
Good Monday Morning!
and many others!
To keep abreast of our post, follow us here or
on Instagram (@mpfconservation) or on Facebook !


Written by Kate Powell  ©MPF Conservation.
May be printed for your own use ONLY, not for use on blogs without permission.

Posted in antiques, art, conservation techniques, Interim Report, painted objects, preservation, process, reparation, restoration techniques, wooden objects | Tagged , , , , , , , , , , , , , , , , , , , , , , , , , , , | 17 Comments

JBC: White Patriotic Jumper Treatment, Tail, Part I


Our White Patriotic Jumper had repairs to be made on the tail,
the tail-to-leg connection, all four legs, and his belly.
When these repairs were completed, we could treat surface repairs and finish.

The White Patriotic Jumper is a sample treatment,
so you can see the process from start to finish!

We began our documentation with the tail.
MPFC’s goal, relative to the tail, was to restore the tail into working condition
as well as reestablish the tail’s joinery components (as Parker originally had intended, wherever possible) to allow for future  repairs without the aid of
technical woodworking skills by future maintenance staff.
A guideline for these repairs will be created by MPFC for the edification and guidance of future JBC maintenance staff to ease the efforts of maintenance and
holistic preservation of the historic carousel horse’s various components.

Please excuse the grainy grey images in the woodworking rooms;
the yellowed lighting creates an odd discoloration.
Note that many explanations are under the images themselves!


The tail had three distinct repairs to be made before it could be reassembled:
tail to rump, a tail break midway in the tail,
and the tail-to-leg connection.  We will cover these in three parts.
The repairs were performed separately over time.
We began with the Tail-To-Rump connection, and outline the tail
tenon and mortise repairs (Part I, below).  The tail break itself is Part II.
Finally, the Tail-to-Knee connection, Part III.  We documented them separately
until we came to fitting the tail back together again, during the painting posts!

The tail tenon is not a separate dowel inserted into the carved tail proper and into the mortise of the body of the horse, but a tenon which has been formed out of the tail stock. This is important because this allows us to move directly toward restoration
of the components rather than taking risky steps toward an attempt to remove doweling from the tail proper. One less risky procedure!

TAIL MORTISE AND TENON

EXCAVATION

First we removed the tail tenon from the rump mortise.

The removal of the tail presented difficulties during the extraction process
because of the “toe-nailing” of bisecting finish nails which penetrated the walls of the mortise, acting as sharp splines which grazed the walls and splintered
the rump’s tulip poplar wood substrate.

The screw through both mortise and tail tenon, shown in images 3-6 above,
was the easiest part of the excavation.  The hidden nails, later repairs, caused many issues.
As the tail was gently pulled, images 7-10, above, hidden nails locked in!  The tail tenon was gradually coaxed from the mortise using steady backward pressure.
When the tail released, three large nails were left — and all these previous reparations
were repaired so the tail is strong again, last two images, above.

TAIL TENON

Excavation involved removing the nails from the tenon.
Spiky nail-spines created tension but did little in actually holding the tail fast in its joinery.  These nails later repairs, not original.

All the holes in the tail mortise were filled in order for the repairs to move forward.
The tenon must be as strong as possible before it is placed back into the mortise with as small as possible gap margin between the tenon surface and the mortise wall, so that adhesion between the two surfaces is not based solely upon the strength of the glues,
but also from adjoining component tension.

To this end, holes were drilled clean, and hardwood dowels were placed through the holes for snug fits.  We used hide glue to secure the dowels.
Hide glue can be loosened with warm water, direct heat, or vinegar, if necessary, allowing for the reversibility of work performed possible by future restoration efforts.

These are left to cure overnight, and trimmed to historic levels.
The tenon was sized into the mortise (concurrently repaired, shown next).
The mortise, due to degradation and damaging repairs,
needed to be augmented by doweling, splines and veneers, then
rebored before inserting the repaired tail tenon back into the mortise.

TAIL MORTICE

The same nails that went through the tail tenon entered the tail mortise, leaving holes.
These were filled in a similar manner as the tenon.  Nail holes were drilled clean of splintering debris, and hardwood dowels were inserted through the holes,
glued with hide glue, and left to cure before trimming.
Debris was thoroughly cleaned from the inside mortise walls.
This is shown in the first two images above.

The mortise was also repaired through the use of a larger dowel system.
Unfortunately, the mortise walls were crumbling.
The mortise was drilled cleanly, a bit larger than the crumbling walls, and fitted with hardwood dowels using hide glue amended with gap filling agents, above.


Af
ter curing, the restored tail tenon was measured and a fresh mortise was
drilled in the proper angle and size to accept the repaired tenon, above, while taking into account the orbit and trajectory of what was left of the original mortise path.

Because multiple sections of the mortise wall were asymmetrical and trumpet shaped, its depth and trajectory needed amending.  This process was a several-part endeavor which encompassed at least eight individual steps which often overlapped the previous step.

The original screw hole was repaired: drilled clean, filled with a dowel,
and readied for the screw to be replaced again. Later in this process the fresh plug was redrilled to countersink a large stainless steel screw which bisected the tenon (as was originally designed) and anchored into the rump block below the tail tenon.


Above, the
restored tail mortise, before and after!

Next, White Patriotic Jumper Treatment, Tail, Part II!

Follow us for updates on the happenings at the stable!
We will continue to take you behind the scenes!  Currently we have:
Jantzen Beach Carousel Moving Day!
The Jantzen Beach Stable is Full!
Good Monday Morning!
and many others!
To keep abreast of our post, follow us here or
on Instagram (@mpfconservation) or on Facebook !


Written by Kate Powell  ©MPF Conservation.
May be printed for your own use ONLY, not for use on blogs without permission.

Posted in antiques, art, conservation techniques, decorative motifs, Interim Report, painted objects, preservation, process, reparation, restoration techniques, wooden objects | Tagged , , , , , , , , , , , , , , , , , , , , , , , , , , , | 18 Comments

A Visit with the Doc, or Carousel Horse Assessment

As promised, an explanation of our assessment process,
and of course, a horse is so much more interesting than a building part!

Terri is a beloved horse from the Jantzen Beach Carousel; locals have fond memories of her!

Terri is also extremely damaged.

We examined Terri with an eye to the necessary repairs to make her stable for many generations of riding when the carousel is finally rebuilt in its new location.

We look at everything:
legs, tail, neck, cantle, pole mount,
and the decorative gemstones.


Terri is set up in our “stable” so that we can walk all around her and
examine both her Romance and non-Romance sides:
the “Romance” side is the side that you see when standing and watching the carousel,
and in the USA carousels move counter-clockwise.
Romance sides are the highly detailed sides, with gems and many decorations!


Terri is not carved from a solid block;
she is created from several blocks joined with hide glue.
This makes her weigh less which is a good thing when she must be moved.


Her teeth and face are dirty; she had gum in her nose.
*Poor Teri, makes it kinda hard to smell the roses!
We took care of that problem, pronto!*
Someone drew all over her teeth with a ball point pen.
Her ear is chipped.  Her eyes and other gems have been covered with dark varnish.

These things are easier to repair.

BUT SHE ALSO HAS CRACKS
IN HER TORSO, NECK AND MANE!

In past she was chemically stripped during a restoration;
chemical stripping of an older object is almost never recommended.
The chemical strip loosened the glue from the joins, and caused warping.
it opened up the large crack shown top left, and a crack around the cantle.

Wood is protected when it is finished, whether paint or shellac or oil finishes;
an open crack allows moisture to accumulate in the cracks and
eventually they open more, causing more moisture…
Finally, the moisture seeps deep into the wood and fissures and causes rot.
A vicious cycle.  The cracks must be repaired for the life of Terri.


Her extended front leg was repaired long ago using unknown putties;
it is likely it cracked from little kids standing on it.
You can see the corrugated nail if you look closely, something laymen don’t see often.
It looks like a squiggle below the break in the center.
*The blue tape allows us to remember the many areas we need to address.*
Unfortunately, most of the the repairs were not proper woodworking solutions;
we need to remove putties to make sure the repair is strong underneath.

Unfortunately, Terri’s hind end is terribly broken.
Both legs, knees, shin and one thigh, all cracked and/or broken.
Her tail is broken in two places,
both at the rump connection and at the knee connection.
These are catastrophic repairs; if not attended to they will break completely off.

Take heed regarding what we are about to caution.
One improper repair is maybe not a big problem.
But imagine many many knee or tail breaks, all improperly repaired.
Each poor repair compounds the next.
Finally someone comes along and squirts epoxy or carpenters glue
into the break just to hold it together for another couple months
and then when it breaks, it rips wood fibers,
making it impossible to knit back together — a shattered broken leg!
This is what we are dealing with in many of the horses.
Many years of improper repairs, one on top of another,
making them more costly to repair
because they are compound fractures full of hidden nails and screws!
Moral of the story, do the job properly the first time…
And ditch the modern glues!

Terri was assessed, but is not in line to be our sample horse for treatment.
We had to choose one horse which had the best sampling of damages for treatment.
Follow us to get the latest installation of posts on the JBC!

Next, we show the restoration of one sample horse:
White Patriotic Jumper Treatment, Tail, Part I!


Written by Kate Powell  ©MPF Conservation.
May be printed for your own use ONLY, not for use without permission.

Posted in antiques, art, conservation techniques, decorative motifs, Interim Report, painted objects, preservation, process, reparation, restoration techniques, wooden objects | Tagged , , , , , , , , , , , , , , , | 7 Comments

Jantzen Beach Carousel Assessment Process


As we’ve probably said we were hired to assess the current status
of the decorative parts of the Jantzen Beach Carousel.
(Another firm is estimating the status of the mechanical and housing parts.)


The carousel has been in storage since 2012, and before installing it in a new location there is work to be done, ranging from paint touch-ups to repairing broken parts.
Decorative parts include 80+ horses, two chariots, 48 lower housing panels,
and multiples of the following: rounding boards, cresting boards, cherub shields, and inner panels.  It would be nearly impossible to assess every part, so
two of each part was chosen randomly plus a dozen horses, to be assessed in depth.
Mitchell and Kate each assessed every part separately then compared notes.
Kate wrote their findings in a report, Mitchell proofed the report.
We wrote on the nature of the damages and options for reparation,
and an estimate was created based on those random parts.

From these estimates highs and lows for various items could be projected
as the first steps toward funding reparation for the carousel.

This was a massive undertaking!

As an architect Kate programmed massive moves and designed and
planned hundreds of square feet
for companies like
Twentieth Century Fox, Wells Fargo,
and Arco — and she swears those
were easier to output than this report!
So much to remember and catch and then transmit to our clients.
(Kate sketches about our processes!)


We will share the process of ONE assessment with you next posting,
so you can understand what goes into determining the problems with each part.

Above, Medium Pinto Stargazer with Cat
is ready for the doctor to give him his physical!
The cradle allows us to gently turn him as needed.

Below, a sampling of the items we have assessed…
Breaks and rips and peeling paint,
buried nails, and missing screws and a few bewildered spiders!


Written by Kate Powell  ©MPF Conservation.
May be printed for your own use ONLY, not for use on blogs without permission.

Posted in antiques, architecture, art, conservation techniques, decorative motifs, Interim Report, painted objects, preservation, process, reparation, restoration techniques, wooden objects | Tagged , , , , , , , , , , , , , , | 2 Comments

The Mystery of the Metal Patches


We’ve inherited a box of old badly damaged pony legs with
butted joinery which have been clad in copper and tin sheeting.
The tacking lines along the leading edges of the butt joinery are so badly damaged
by the tacking one must speculate about the advantage of such a repair
as it exacerbated wood substrate issues and nearly destroyed the legs.
We are reminded of the folk adage, “If the disease does not kill you, the medicine will!”

On the other hand, we do not know
what prompted repair people from long ago
to make these unusual repairs instead of
creating proper woodworking repairs.

A mystery!

We originally thought these broken legs were a thing
of the past, an anomaly, until we saw a teeny bright
bit of copper on our Buckskin Lily Hunter, right.
Once we had the eyes to see the shape of these
repairs under paint, we saw they were everywhere!

What is the origin of the cladding?
Was it placed on the horses at the time they were created as a way to create additional strength and smooth contours around a potentially weak joint of seam?
Was the cladding an addition to areas with breaks and erosion used as a stop gap measure by maintenance workers who did not have woodworking skills?
Was there simply no dollars within their budget to perform proper repairs?

Clues


1)  The creation of the horses were executed by skilled woodworkers.
The incorporation of complex joints into the knees and thighs speak to an understanding of how wood performs and what is necessary in creating a viably engineered structure.
We surmise no skilled crafts-person would incorporate such cladding as the tiny tacks would undermine the original structure, create a surface not in keeping with authentic carving and lead to finish/paint problems throughout the horse’s life.


2) Not all members are clad.  Some horses have cladding on several joints, like the Turquoise Parker Pony shown above.  Other horses have none at all.
Some horses have strangely asymmetrical cuts of sheeting with
an over-layering of thin straps over the top, shown above, left.
This is consistent with a “fix.”  This is clearly not part of the original engineering.

A number of horses have copper/tin wrapped around the tail stumps,
such as our Dappled Grey Water Horse, above.
The cladding extends up onto the rump like a patch,
then cuts in an irregular pattern around the tail proper.
Again, not all horses have tail repairs with this cladding,
nor is it applied in exactly the same way from horse to horse.

Conclusion

Sometime during their long life when maintenance was looking for quick fixes which would not require expensive skilled labor repairs, they did this.  Maybe it was a common repair with carousel people as we’ve heard it mentioned by others.

The cladding is contributing to the viability of specific joints,
but the downside to these patches is fracturing paint and
the unknown atrophy of surface wood beneath.
We suspect rot under the patching, but cannot tell the extent.
Dealing with rot means expert woodworking treatments.
Also, the tacking lines may have undermined the wood substrate
requiring additional repairs. How does one create a treatment plan
without having knowledge of the actual damage?

Facts From The Forge Master

An interesting bit our master blacksmith shared about certain copper sheet cladding:   Depending upon its thickness and blend of alloys; if the metal is subjected to high heat, then immersed in cold water, it will become pliable for a period of time!

In the case of the carousel horses, we surmise a pattern was taken of the area which was failing, strategically cut out with metal shears, then put beneath a torch or dropped into a forge until it was red hot.

Once the cladding reached a certain temperature it was immediately immersed
into cold water until it could be manipulated without burning hands.
The temporary molecular shift allowed the repair person to mold it around
the damaged member, much like aluminum foil, occasionally lightly tapping
it with a mallet to create necessary folds and contours.
In the end there was just enough time to penetrate the edges of the metal with a succession of box nails in order to assure the sharp edges were securely affixed into the wood.

After it cooled, they built the area up with a plaster mixture and painted
over the entire piece, essentially creating an exoskeleton or a barely visible
cast over the degraded element.  So we see very knobby knees and bulked tails!

Follow us for updates on the happenings at the stable!
We will continue to take you behind the scenes!
To keep abreast of our post, follow us here or
on Instagram (@mpfconservation) or on Facebook !


Written by Kate Powell  ©MPF Conservation.
May be printed for your own use ONLY, not for use on blogs without permission.

Posted in antiques, conservation techniques, Interim Report, painted furniture, painted objects, preservation, process, reparation, restoration techniques, wooden objects | Tagged , , , , , , , , , , , , , , , , , , , , , , , , , , , | 8 Comments

Textile Conservation: Victorian Tea Cosy


We have several interesting textile projects in the studio this year,
and one of the most challenging is this Victorian Tea Cosy
for a private client who has generously allowed the process to be shared.

There are five posts to this project.
The pages are:  Textile Conservation: Victorian Tea CosyTextile Conservation: Victorian Tea Cosy, 2, BeadsTextile Conservation: Victorian Tea Cosy, 3, BeadingTextile Conservation: Victorian Tea Cosy, 4, Beading; and Textile Conservation: Victorian Tea Cosy, 5, Beading

Today I began the excavation (disassembly) of the Cosy.
This tiny project (under 15-inches wide) is a complicated piece,
with issues such as cleaning, burnt beading, missing beading,
brittle linen gridwork, missing needlepoint… and it is beaded on both sides!

Above are details of both sides “A” and “B”.

The colors will change throughout as I choose images based on the best details,
and flashes change the color tremendously.
Already, with just a bit of trim removed,
we see the bright green the Cosy once exhibited!


The braided trim releases easily, though there were a few areas where
someone previously hand-repaired the Cosy; these repairs are quite difficult
to navigate without damaging the beaded areas.
The repairs wrapped several layers of thread tightly wound
and traveled deep into the needlepoint field.  Something to think about if you have to create a temporary repair: Hold it loosely!

Once the trim is removed, the Cosy disassembly begins.
Again, there are areas which were hand-repaired and these stitches are carefully cut.

Many stitches were so brittle that when one was cut several more popped apart,
however, it is best not to ever assume and pull, hoping to save time.
It is equally easy that there will be a repair that might rip,
or a strong stitch that holds and you rip the textile.  Patience is key.


The two sides are finally apart, above:
Side B is top, and Side A bottom.


We also see the inside of the Cosy!
While it is unlikely this Cosy will ever by used again,
it once topped hot teas, and the steam embedded dirt on the inside.
We are replacing the inside.

The textile is removed from the lining!
This is the most nerve-wracking work, as the we know the linen gridwork is brittle,
areas are already ripped, and we don’t know the condition of the small hem.
I prefer a stitch-picker to any other cutting device.
I can move the protected blade outward away from the textile, and clip only
the one stitch I see on the tip of the blade by sliding it back.

And we get our first look at the back of side “A” textile.
It is extremely damaged piece!  Besides tears in the gridwork, the dark brown “stains”
on the back are actually areas where beading was beginning to melt!

The color of the various threads tell a story that I interpret once
enough of the piece is apart… This is guesswork, but educated guesswork.
Kate takes notes throughout as reminders.

Black thread added the braid to the Cosy, and this tells me that it
might be original but might be second generation… because…

A dark brown thread may have been used as a basting stitch to secure the top
of the Cosy prior to final stitching of the entire piece altogether.
it lay just below the faded green thread.

A faded green thread hand-stitched the textile to the lining… it appears a khaki color, but up close you can see that it may have matched the original brilliant green yarn!

Finally, the repairs were created using a thicker tan thread, and appear sporadically.

Kate began to lift the lining from the textile, and ran into a snag.
Beads which melted (first image) had also adhered to the cotton batting.
This will be dealt with during the reparation, so the batting was carefully snipped;
we will discuss melting beadwork in another post.

Side “A” is disassembled, above.

A through assessment, and there are a few surprises,
including the cotton batting melted into the textile, and two areas where the previous repairs went too far and tapped into the gridwork.
None of the rips are a surprise, however.


This textile cannot be cleaned until the entire piece is stabilized and all the beads
are secured.  In just this round of gentle handling six beads dropped.

We will be documenting this treatment over the next year;
you can follow along by requesting updates!

Next in the series is an article on finding appropriate beads!

©MPF Conservation.  May be printed for your own use.
May be reposted if our url + copyright is used as reference.

Posted in antiques, art, conservation techniques, decorative motifs, Interim Report, preservation, process, reparation, restoration techniques, textiles | Tagged , , , , , , , , , , , , , , , , , , , , , , | 2 Comments

Horseshoe Mystery!

The subtlety of the carving detail on the legs of the carousel horses is extraordinary!

Parker has cleverly placed his identifying mark, “C.W.Parker, Leavenworth, Kan,”
on the bottom of most horseshoes, such as these on the extra-large horse, Terri, above.


The horseshoes are a separate metal shoe on all but the tiny Parker Ponies, below.
Above, a medium older leg completely stripped;
you can see the place where the horseshoe attached with tiny nails.


You can also see the size of the feet on the Parker Ponies
changed over the years: the younger horse with big feet is on the left.

The Mystery:
Some of the horseshoes
have an additional mark!

MPFC cannot comprehend the
importance of the secondary marks.

On the Large Hunter Jumper above,
the Roman Numeral “V” exists…
Is this for “5”?  And why?
Or is it, laughably, a “V” for
Very Very old carousel horse?

We cannot detect a pattern: All the Large Black Stargazer’s extra marks are an “L”,
so you might think, a large horse, right?  Or is that a fifty-year-mark!?
Fifty of these models?  Fifty horseshoes made?
But why are the Water River Horse shoes labeled “L” and he is HUGE,  an extra-large!
And Terri is an extra-large and she has no extra identifying marks…

Plus there is another mystery… some of the horses have two marks on their shoes.  On the Water River Horse, three are marked “L” and one “V”!
Makes no sense, but we are certain the numerals mean something!

On the Medium Pinto Stargazer, above, “37”, the only numerals
that are not Roman, adorn all four shoes.  WHY?

Does anyone know why these
horseshoes are marked this way!?!
The horses are refusing to say!

Follow us for updates on the happenings at the stable!
We will continue to take you behind the scenes!  Currently we have:
Jantzen Beach Carousel Moving Day!
The Jantzen Beach Stable is Full!
Good Monday Morning!
and many others!
To keep abreast of our post, follow us here or
on Instagram (@mpfconservation) or on Facebook !


Written by Kate Powell  ©MPF Conservation.
May be printed for your own use ONLY, not for use on blogs without permission.

Posted in antiques, conservation techniques, painted objects, preservation, wooden objects | Tagged , , , , , , , , , , , , , , , , , , , , , , , , , , , | 8 Comments

JBC: Virtual Sketching!

Carousel horses have always delighted, even in the midst
of virtual games and E-ticket rides;
most of us don’t stop and look at them,
but are seduced by the Wurlitzer calling to us,
and the color and the action and the lights.

Kate runs a group of artists from around the world who paint from images
through a virtual meeting where they all paint a place together and enjoy the company
that comes from sharing.  Each month a different place is chosen and the
Virtual Sketchwalk group makes art from the photos offered for that walk.

This month we did images from the
Jantzen Beach Carousel!

*As you scroll through the slideshow the artists names will appear!*

Follow us for updates on the happenings at the stable!
We will continue to take you behind the scenes… Currently we have:
Jantzen Beach Carousel Moving Day,
The Jantzen Beach Stable is Full!, and the Parker Ponies!
To keep abreast of our posts, follow us here or
on Instagram (@mpfconservation) or on Facebook !


Written by Kate Powell  ©MPF Conservation.
May be printed for your own use ONLY, not for use on blogs without permission.

Posted in antiques, art, decorative motifs, musings, News, painted objects, wooden objects | Tagged , , , , , , , , , , , , , , , , , , , , , , , , , , , , , , , , , , , | Leave a comment

Happy Valentine’s Day

 
Happy Day!
Love is in the air in the stable!

He’s grinning cuz he’s in need of lots of TLC
and this is the place to get it!
Poor Stargazer is chipped and broken and oh my, he is so wonderful…
I love Pintos!


Written by Kate Powell  ©MPF Conservation.
May be printed for your own use ONLY, not for use on blogs without permission.

Posted in antiques, art, conservation techniques, decorative motifs, Interim Report, painted objects, preservation, process, reparation, restoration techniques, wooden objects | Tagged , , , , , , , , , , , , , , , , , , , | Leave a comment

Parker Ponies

People don’t realize how tiny the Parker ponies are;
I can just about carry one under my arm!

I found a good way to show you…
Letting the studio cats in for a visit with Pinto Pony
(he’s got the turquoise and red bejeweled saddle),
while I did some rearranging and filing.

Pinto Pony on the floor scared Yaman into hiding,
but Savitri and Hari-Gibbs-Fred
thought he was a new playmate.

Last week the ponies were assessed.

It is a bit like a checkup:
every inch of them is reviewed,
and legs and tails
are jiggled to make sure they are
sturdy for a kid to climb on.
We list what needs to be repaired,
which can be a lot when you are 100,
and also to understand their history.

They are so beautiful!

We think these two ponies are different ages.
The White Jumper Pony with the turquoise fringed saddle with the horns is much older.
Her finish is more tattered and worn…
She has teeny tiny little feet, while Pinto Pony’s feet are a sturdy size up!
She’s been repaired many times, so much that her
legs and joints have gotten thick and lost definition…See that on the left?
She has more breaks or areas that need to be stabilized.


She is so old that her repairs were done with copper cladding
not unlike the extra leg we found laying about in storage.
we don’t know why, but doubt a woodworker would do that
because it messes with the structure.
We hope to unravel this mystery; we can do that if we get the chance to
repair a leg or tail with the copper cladding in place.


They look the same
until you really look.
The shape of the
Pinto’s head is fuller,
his eyes bigger.
White’s tail is sweeter,
more defined,
and she looks like
she is watching you…
A little wistfully?

Different carvers,
and even the functionality of
the seat shows thought —
Hers holds your bum better,
and has that nice horn.


But wait!  Pinto has jewels
not only on his romance side,
*that’s the side you see when
you look at the carousel*
but all the way around!

And he’s got that Cruella de Vil
streaking thang going on with his mane!
I mean, he is styling!

Pinto won’t be getting the
makeover that White will…
She’s got enough broken bones that
she’ll get some nice new paint on her!

Keep following us for these
updates on our progress…


Written by Kate Powell  ©MPF Conservation.
May be printed for your own use ONLY, not for use on blogs without permission.

Posted in antiques, art, conservation techniques, decorative motifs, Interim Report, painted objects, preservation, process, reparation, restoration techniques, wooden objects | Tagged , , , , , , , , , , , , , , , , , , , , | 3 Comments

Good Monday Morning!


“Good Morning!”

Yup, we talk to them, saying good morning when we come in…

I’ll worry when they start talking back!

Water Spirit Dappled Grey Horse from the
Jantzen Beach Carousel…

Did you have a favorite?


Written by Kate Powell  ©MPF Conservation.
May be printed for your own use ONLY, not for use on blogs without permission.

Posted in antiques, art, conservation techniques, decorative motifs, Interim Report, painted objects, preservation, process, reparation, restoration techniques, wooden objects | Tagged , , , , , , , , , , , , , , , , , , , | 4 Comments

The Jantzen Beach Stable is Full!

After what was the best
difficult moving days we’ve ever had
(go here read about that),
the horses and many shields
and cresting boards
are in our studio,
which now has a large room
called the “Jantzen Beach Stable”.

When we come into our secure lobby,
the black peekaboo “Portland Horse” greets us.

The dappled grey water horse and an armored horse share the lobby, though
I admit they are a bit dwarfed in stature by the Portland Horse’s amazing mane.

What a joy to see coming into work!


The Stable holds 8-12 horses.
This is where most of the work will be performed.

The Parker Ponies rest on famous Mason Monterey sofas
in the room where furniture from the historic Frank Crowe Estate resides.
The horses (and carousel) were born within a decade of the lovely colorful
Monterey furniture and they feel simpatico.

The long cresting boards are laid out for assessment, above.

It’s not all about the horses, though.
Chariots and shields are covered with 
lions and roosters and cherubs and posies…
It is a joy to be around them!

Follow us for updates on the happenings at the stable!
We will continue to take you behind the scenes!
You can also follow us on Instagram (@mpfconservation) or on Facebook !


Written by Kate Powell  ©MPF Conservation.
May be printed for your own use ONLY, not for use on blogs without permission.

Posted in antiques, decorative motifs, Interim Report, painted objects, preservation, reparation, restoration techniques, wooden objects | Tagged , , , , , , , , , , , , , , , , , , , | 12 Comments

Jantzen Beach Carousel Moving Day!

Note: The images all have notations if you scroll through.

“You want us to do whaaaat?”

“Yes, that’s right, first, this mess has to be cleaned up!”

We first arrived to assess
the horses, because it starts
with the horses, the stars of
the show!  It was to be a
simple assessment of the Jantzen Beach Carousel Horses toward proper restoration.
This is what we found:
an itty bitty walkway (cover your pants in grease as you went) where we had to duck and bob and look around shields and beams and poles underfoot, to see the horses tucked way back into the left corner.

Mitchell is standing on an 18×30-inch cleared stand-able space, above.
I am immediately charmed by the horses lined up, so touchable!

Actually, noone gave us
marching orders but it makes for
a great story. We had to clear
paths to inspect, let alone MOVE,
the horses for assessment.  Quickly
the scope of the assessment changed,
including all decorative objects —
defined as anything not mechanical
(another firm is handling
that part of the assessment.)
Now our goal became clearing a
safe path to all the decorative objects,
even those deeply buried and
completely inaccessible, such as the
two bench seats (chariots)
and the 9-foot Cresting Boards, right.

The four moving men were divided into two groups.
We spent the whole first day stacking floor and ceiling wood at
the right end to open the blocked space, while at the left end we were moving
the tightly packed horses and shields out onto the main floor in order
to re-stack the shields out of the paths.
By the end of the long day we had reached our impossible goal,
and could actually walk around without tripping.

NOTE: Specs of white floating in the images are dust in the storage facility.

We also found the smaller bench, the Lion Chariot!
(You can see how the guys had to move in a tight short cramped space.)

Two more days!

Again, Mitchell and I worked left side / right side.
On the right side they finally were able to move the huge stack of 8×8 beams temporarily.
They carefully inched the huge heavy double-bench chariot out,
and carried it where it would be loaded into the moving truck.
Then re-stacking…
We needed to share this space with the operational assessment crew.

Right side, the rounding boards were moved and assessed, then restacked.
We decided the cresting boards should be stacked in front of them.

On the left side, several beams needed to move out onto the floor for assessment,
and also to allow us to move the cresting boards out for repositioning.
Above, Vitaliy and Tim lifting the decorative beams on one side,
while Joe lifts and steadies the beams in the back.
Several decorative beams were moved out for inspection and assessment.

Finally the cresting boards were stacked neatly in front of the rounding boards,
last image; two came back to the studio.

Day two, I assessed several items that will not come back with us to the studio, as they are either too long or too heavy: Beams, mirrored shields, painted shields.

Our first load also leaves for the studio:
Cherub shields, decorative mirrored shields, cresting boards.
A couple of Parker Ponies ride in my back seat!

We leave that night with the storage place in heavenly order, above;
a few objects must go back into the storage so it can be locked up.

End of second day, heavenly order!

Third day, the horses.

We chose our initial horses on day two when we finally had room to
move around (last image).  We wanted to take two of each size,
but also wanted a sampling of the types of damages on all the horses.

By day three we had our options, and final choices were made.
The guys carefully loaded the wonderful horses, above,
and the HUGE chariots and other parts into the truck!
Fifteen (mostly) badly damaged horses came back with us.

All the lovely horses were patted 
with a promise to be back SOON.

Before and after, above.
  Marie Kondo has nothing on us!

Some of the horses that were chosen, above.

Next post, we show you behind the scenes in
The Jantzen Beach Stable is Full!

Above: Vitaliy Kolyvanov, Sean Morgan, Tim Carter,
Adam Todd (Portland’s Best Movers), and Joe Mabbott!

Follow us on Facebook
or on Instagram @mpfconservation!

Written by Kate Powell  ©MPF Conservation.
May be printed for your own use ONLY, not for use on blogs without permission.

Posted in antiques, conservation techniques, decorative motifs, Interim Report, painted objects, preservation, process, wooden objects | Tagged , , , , , , , , , , , , , , , , | 34 Comments

Deadlines: A Re-post from Kate’s Art Site

Kate has a site where she posts about her art journaling.
Of course, our work is often a subject… This is from her post at  dkatiepowellart.


Deadlines are stressful, and partly it is because of my age;
I am simply not as young as I used to be, and when hand stitching an item like the sofa,
my arthritic hands feel it, as I am going through several layers of thick gimp and silk.

Thankfully I get to stitch side-by-side with Mitchell;
we stitched together at opposite ends of the sofa.
We listened to Michelle Obama’s autobiography, read by her!
(A great read, and having little to do with her life as first lady.)

I thought you might like to see the real thing this time…
The actual antique sofa below, and earlier sketches.

It is wonderful to have this visual remembering!

Posted in antiques, French Furniture | Tagged , , , , , , , | Leave a comment

Hunzinger “Lollipop” Chair, 1 Excavation

Our armchair, affectionately known as the “lollipop” chair, was made circa 1880.  George Jakob Hunzinger (born 1835 in Tuttingen, Germany), was a progressive designer out of New York who was often influenced in his designs by machinery; their geometry and patterns of repetition in their elements.   This is a Hunzinger original, a family piece, which has weathered more than a century of continuous use.

This slideshow requires JavaScript.

The chair needed re-upholstery,
as the seat was failing.
Our clients chose a leather
similar to the original leather,
which our client remembered.

There were issues with
the mortise and tenons at
all four leg stiles, front and back.

As is often done,
previous upholsterers
and repair people had
“made do” in their repairs,
using screws and and nailing
through tenons instead of
creating a proper repair.

EXCAVATION, a Slow Strip!

As always, we begin with a deliberate slow excavation.
Excavations are often rushed by inexperienced upholsterers,
but there is so much to be gleaned  from paying attention
to everything as you take apart each layer.

The chair is turned upside down: webbing is removed,
and the springs are set free to bounce!

“The underside of a chair is often neglected
because it is the least seen and therefore often taken for granted!
It’s importance, of course, is
the foundation for support and comfort of the sitter, but it is also, from the standpoint of the engineer, the focal point for the distribution of load.
Springs had not been used in chairs more than a few decades
before Hunzinger built his chair and the introduction of
their buoyant properties revolutionized upholstery!  The introduction of springs to upholstery frames created a stress dynamic which most designers and upholsterers now take for granted, and those stresses from lateral motion of the spring under tension impact the way a frame performs, especially if careful thought has not been taken to include bracing: the frame must withstand the stresses.

Notice how modest the depth of the seat apron is
relative to the actual height of the coil spring.
The springs are four times the height of the seat frame!
Their coiled energy was expertly compressed within the modest seat frame,
attached between basket woven jute webbing and linen lashing cord. 
This technique added comfort and versatility to objects created
for both an aristocratic class and a now burgeoning “middle” economic class
who desired both grace and comfort.   This chair has given 150 years of comfort
and is just now begging for attention. Now it is important to make
thoughtful repairs to this modest frame so it can withstand another century,
or more, of spring compression through daily sittings”  ~Mitchell

From the top, the current show cover is removed to expose the previous
show cover, a woven coral cotton-rayon from the early 20th century.

The “second stuffing” (term used in the industry) cotton topper and hair are lifted.
The hair is carefully vacuumed through a filter.
Most of the fiber will be reused when the re-upholstery is performed.

The primary seat stuffing foundation’s flax-straw pod stitching is released,
and the fiber pod is carefully set aside for conservation.

The canvas dust membrane which covers the jute webbing is vacuumed;
we find more information about the chair’s history.
Bits of green fiber beneath tack heads and embedded in the stuffings
show at least one previous show cover.

“Modern upholsterers used inappropriately large tacks,
which are seen next to the smaller tack, and this is a common mistake.  The seat frame, as well as the legs, though they look to the casual eye to be crafted from mahogany, or walnut, are actually birch which makes both joinery and tacking surfaces less robust than most hardwoods.
The rabbeted tacking margins, including the underside of the seat frame, are peppered with excessive holes and splits from over-takings.
If not properly repaired, they will in time make upholstering impossible
without causing catastrophic damage to the frame.” ~Mitchell

The last bits, the springs, are dangling from the frame.
We measure and set aside.

The frame is ready for reparation, next post….
Hunzinger “Lollipop” Chair, 2 Frame Reparation

This slideshow requires JavaScript.

Written by Kate Powell  ©MPF Conservation.
May be printed for your own use ONLY, not for use on blogs without permission.

Posted in antiques, art, chair, conservation techniques, decorative motifs, Interim Report, preservation, process, reparation, restoration techniques, upholstery, wooden objects | Tagged , , , , , , , , , , , , , , | 9 Comments